
Traveling on the open road with your cherished RV becomes an unparalleled adventure, and maintaining its impeccable appearance is a testament to your commitment. In this comprehensive guide, we delve into the intricacies of DIY RV detailing, transforming your motorhome into a rolling masterpiece without the hefty price tag of professional services. With a meticulous step-by-step approach, we unveil the secrets of achieving a glossy, showroom-quality finish that goes beyond the conventional wash and wax routine. From roof cleaning to paint decontamination, our guide navigates through the essential techniques, ensuring your fully painted motorhome reflects the care and dedication you invest. Join us on a journey of rejuvenation as we empower you to master the art of RV detailing, making every mile on the road a testament to your commitment to excellence.
Revitalize Your RV: A Comprehensive Guide to Professional-Level RV Detailing
Going on the journey of maintaining the pristine appearance of your RV’s full-body paint job involves a crucial decision. Either break the bank with professional detailers or roll up your sleeves, equip yourself with the right tools, and master the art of DIY detailing. Opting for the latter offers a cost-effective approach without compromising on the results, provided you have the time, patience, and interest. In this guide, we’ll break down the steps for detailing your fully painted motorhome, ensuring it looks as good as new without the hefty price tag.
1. Tackling the Exterior Step by Step
Detailing a fully painted motorhome demands a systematic approach to avoid overwhelming tasks. Plan to spread the workload over several days, addressing each aspect with precision. The key steps include roof cleaning, bug removal, overall washing (including awnings), tire cleaning/protecting, clay-bar paint decontamination, polishing/swirl removal if necessary, paint sealing, wheel cleaning/polishing, glass cleaning, and water repellent application for the front glass.
2. DIY vs. Professional Detailers: Making the Right Choice
While commercial detailers are a convenient option, choosing them wisely is crucial. Many often skip professional steps, providing a mere wash and wax with a one-step product. Understandably, the cost constraints set by motorhome owners limit the scope of a true professional job. Achieving premium results demands dedication, making the DIY method a preferred choice for those who genuinely care about their RVs.
3. Achieving Glossy Results: Clay Bar and Swirl Removal
For a showroom-quality finish, consider the use of a detailing clay bar to eliminate tiny contaminants from the paint surface. Performing a paint decontamination test with a plastic bag can indicate the need for this step. Swirl removal becomes imperative for large motorhomes due to the use of aggressive cleaning methods. A random orbital buffer is essential to achieve a blemish-free surface, ensuring your RV boasts a slick, smooth, and glossy appearance.
4. Polymer Sealant: The Final Touch for Long-Lasting Shine
The culmination of the paint detailing process involves the application of a long-lasting automotive polymer sealant. These sealants outshine traditional carnauba wax products, offering extended durability, easier application, and enhanced vehicle cleaning. While over-the-counter products are available, sourcing premium options from detailing specialty stores or online ensures superior results.
5. Detailed Steps for Exterior Detailing
- Step 1: Roof Cleaning Start from the top with a focus on fiberglass roofs, employing techniques like waterless cleaning for effective results.
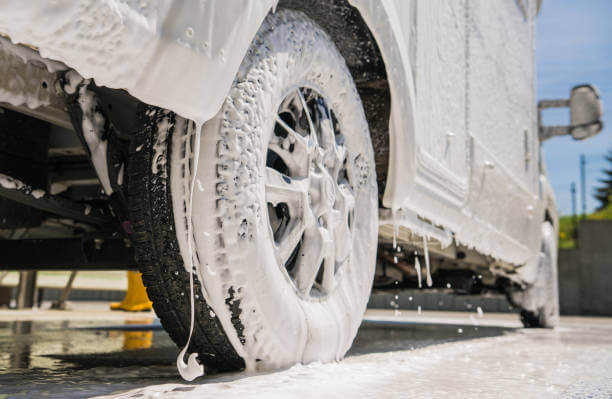
- Step 2: Motorhome Washing The thorough washing process involves wetting the surfaces, using a hose-mounted foam gun, and carefully brushing or swabbing, followed by rinsing and drying.
- Step 3: Awnings and Slideout Covers Extend the detailing process to awnings and slideout covers using specialized cleaners and gentle brushing techniques.
- Step 4: Bug Removal Routine bug removal becomes a necessity, with recommended products like Optimum’s Power Clean and Aero Cosmetics Wash Wax All for both wet and waterless methods.
6. Professional Steps: Clay-Bar Decontamination and Paint Polishing
- Professional Step: Paint Decontamination After the initial washing and drying, proceed to clay-bar paint decontamination to achieve a super-smooth paint surface.
- Professional Step: Polishing and Swirl Removal Separate polishing from sealing for professional results, utilizing an electric buffer, a white foam pad, and quality polishes like Griot’s Complete Compound.
7. Sealing the Deal: Paint Sealing for Lasting Protection
Following the clay-bar and polishing steps, seal the paint with synthetic sealants like Rejex Paint Sealant or Wolfgang Deep Gloss Paint Sealant, ensuring protection against the elements for four to eight months.
8. Finishing Touch: Tires, Wheels, and Glass
Conclude the detailing process by addressing tires, wheels, and glass. Clean and protect tires with dedicated products, polish wheels for a high gloss, and apply a water-repellent spray to enhance visibility through clean glass.
By following these detailed steps, you’ll not only restore your RV’s showroom shine but also contribute to the longevity of its components, enhancing its overall value for future trade-ins.
Join the E3 Camping Membership today and become a part of a vibrant community that shares your passion for RV adventure. Together, we can make your dreams of RVing and camping a reality, while embracing the spirit of empowerment. When you sign up, you get instant access to our magazines, 200+ lessons and courses to be a better camper and RVer, tools, product discounts, events, a HUGE community of campers and RVers around the country, E3TV episodes, articles, and many other amazing things.