
By Kevin L. Vaughn
Sometimes, it feels like a curse, as certain situations jump out at me as “not the best” and keep eating at me until I express my thoughts. I have the “gift” to easily recognize someone new to motorized RVing. Face it, a laundry list of telltale signs comes to mind, but few stand out more than leveling abnormalities.
Yesterday, I noticed a 38’ bright new blue Discovery (Class A) diesel pusher from Wisconsin parked on an adjacent lot in Florida. What caught my eye were three distinct characteristics that screamed “NEWBIE.” First, the entry step was so high off the ground that the occupants had to put an aftermarket step stool below it just to ascend the stairs. Second, the rear wheel wells were high above the rear drive tires. Lastly, the front wheels were suspended about 2-3” off the ground, with the front leveling jacks nearly fully extended. I had to hold myself back from giving unsolicited advice on the spot, hoping for a chance to meet the owners socially to ask about their setup. For all I knew, it could have been some new 2025 “specialized” equipment setup.
Then, this morning, I noticed the same Discovery on the adjacent street preparing to leave the park for their next destination. The owner was vigilantly working on the driver’s side mirror pod with noticeable side-to-side play. I strolled over to inquire about his progress. I assessed that the mirror stem was secured by simply a standard flat-head screw that was not cooperating to tighten up the mirror as he hoped. I could tell he was frustrated already.
The owner explained that it was 2024 that had just been purchased and that they were on their maiden voyage. Although it had a beautiful paint scheme (which I complimented him on), I could easily pick out several quality issues in the construction. After a quick chat before he was ready to depart, I “cautioned” the owner not to let the front wheels be suspended off the ground by airbags to avoid damaging them. The owner commented that he used the Auto Level, which is how it ended up. The lots at this park are nearly all 100% level, so this was abnormally leveled. That opened the door to a quick ad hoc lesson on Leveling 101.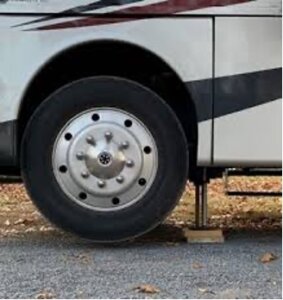
If “necessary” due to the level of your lot, it is not detrimental to allow the front wheels to be suspended and hang on “Standard Spring Suspensions” like those on a Class C RV. This leaves the steering components hanging basically by the “A” arms and bushings. Up to a week should not cause any issues, but I would not recommend it for long periods as it may deform or degrade the rubber bushings. Suspending your RV on the jacks does represent a risk in heavy wind conditions because the leveling jacks have strength vertically but not laterally. When an RV is pushed hard from the side, the jacks or mounts could potentially bend or fail. Therefore, it is recommended to be down on your tires for optimal stability in storms.
The guidelines and damage risk differ when leveling Class A or Super C RVs with air suspensions. The RV body is connected to the axles and suspension components via cylinder-like airbags, providing the refined ride they are known for. Some high-end RVs enable the airbags to provide dynamic ride and even airbag leveling without using the leveling jacks.
Therefore, if you allow the leveling jacks to lift the coach body too high, then the wheels/axles could be basically “dangling” by the rubber airbags. That is a significant amount of weight. This extreme weight presents the risk of potential “failure” in some way, shape, or form, especially if the airbags are older.

Auto leveling is a great feature on motorized coaches, but it lacks the intelligence to keep the wheels on the ground. The typical leveling system only knows how to level the coach, raising it upward until both ends create a level surface. The systems do not know how to correct themselves by lowering the jacks. Frequently, as the coach raises one end up, it raises it too quickly and too far up, then the same occurs on the opposite end, after repeating that several times it could generate an “excessive slope” error.
That is where a 4’ carpenter’s level comes in handy to level the coach manually. I start by lowering the front wheels back to touching the ground; then, I place the carpenter’s level on the front floor. Next, I lower the coach’s rear until the carpenter’s level indicates that the coach is level. Furthermore, I check the level at both the front and rear of the coach before calling it “officially level.” Finally, I check the side-to-side level and make any necessary corrections.
In the worst-case lot scenarios, I may place multiple wooden blocks in front of the steer tires and drive up on them to give myself additional front height and keep the tires in contact with a solid surface. Then, I would attempt to Auto Level again.
Leveling your RV is crucial for your safety inside and the functionality of your slides, appliances, and water flow. Therefore, it pays to come equipped with various blocks to give you the necessary tools no matter the circumstances. If added blocks still do not permit leveling your RV, I suggest inquiring about changing lots to make your stay and leveling more conducive.
For anyone who is a new RV owner or upgrading to a different level of RV (pun intended), it is a no-brainer to invest in training that includes the skills and know-how behind it.
Safe Travels and Jacks Up!