One of the keys to a successful and uneventful trip with your RV is the timely completion of an organized Pre-Trip inspection of your complete vehicle, and anything towed behind it. However, no Pre-Trip inspection will ever compensate for not sustaining a regular maintenance schedule on your equipment.
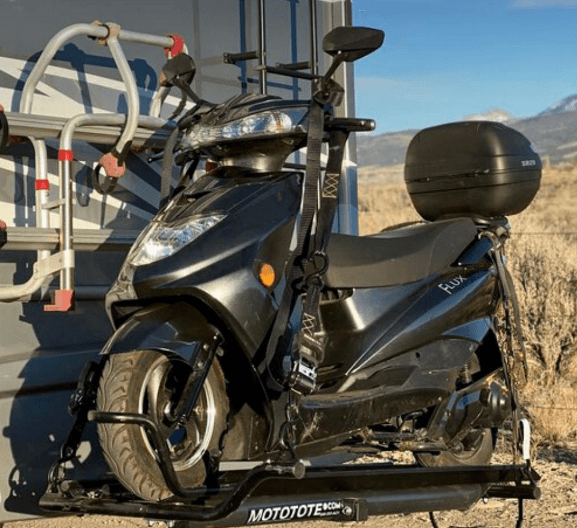
A thorough Pre-Trip inspection basically ensures that your entire rig is simply “Road Worthy” of a trip, whether that venture is to a local gas station for fuel, or a 400-mile leg of much longer road trip. A Pre-Trip inspection should at least include a validation of the following; engine & generator fluid levels, generator readiness, tire pressures/tread/rim/sidewall condition, exterior glass condition/status, exterior bay doors/cabinets are secured, safety equipment is on-board and in-place, hitches are locked, accessories are secured, awnings/slides are fully retracted and electrical equipment function as expected. This inspection should be done in a “routine manner” before each trip, while also keeping an eye out for leaks, sprays, loose structure and any irregular wear and the appearance of the RV balance and ride height.

Apache Junction, AZ, USA – October 30, 2019: Enjoying the captivated view from our RV
So, let us say your rig passes your 15-minute Pre-Trip inspection with flying colors, and you depart with haste down the road. Make sure to stop again in about 15 minutes or so and do one more walk-around to ensure the status of everything has not changed. These changes might include safety equipment coming loose, awnings beginning to extend, stairs opening, air/electrical lines disconnecting and cabinet doors becoming partially closed, just to name a few. Expect anything!
After buttoning up any emerging issues, you then continue along your way to your destination where you proceed to park your rig, level it, and disconnect from any tow vehicle. Next, just as you catch your breath you withdraw your keys and open the door of your RV only to find a gut-wrenching mess, This demoralizing sight has just taken all the wind out of your sails, and the excitement out of the entire trip. You may be faced with contents inside the RV that may have shifted, cabinet doors that may have come open, drawers that may have slid out into the front of your refrigerator, kitchenware that was on the counter which is now strewn through the RV, the microwave door that came open and the glass plate is now in a hundred pieces on the floor. This is all because your entire attention to getting ready to leave was focused on only the exterior of the RV.
 To avoid this oversight and the subsequent mess, I drafted a one-page laminated checklist known as my “Pre-Flight Checklist.” Room by room it reminds me to validate the status of certain items, and to take pre-trip action on other items. I divided my checklist into specific actions for each interior room so that anyone I travel with can be handed the checklist to begin the process without me standing over them. Initially, this list was on a paper tablet until I flushed out everything into a comprehensive list. Over the past 2 years, I have proven that I should never rely on my memory alone to recall each item, because there are always so many conversations, concerns and distractions that lead into that time right before departure.
As your family, RV, and responsibilities grow, so should your Pre-Flight checklist. It is obviously clear that one oversight on this list could cause several hundred dollars in damage, or hours of additional work preparing to leave and the potential of delaying your arrival along the way.
RV Pre-flight Checklist
Interior Activities
Cab
- Load directions into the GPS, and have paper maps on the dash as a backup
- Enable your dashcam to RECORD
- Make sure the cab coach seats are not reclined and slid forward to avoid slide travel
- Remove any items from the path of the slides before retracting each, if applicable
- Remove any items from the dash that are loose and may slide
- Make sure TPMS is plugged in and viewed for at least one cycle
- Validate the levels of all holding tanks
- Validate the level of your propane tank(s), if applicable
- Ensure all slides are fully retracted and any locks are in-place, if applicable
- Ensure all Televators are fully in the down position
- Ensure the hot water heater is turned off
- Ensure the water pump is turned off
Kitchen Area
- Raise all window shades
- Check that all cabinets and drawers are closed and latched shut
- Remove all loose items from the countertops and table
- Cover any cabinet/drawer handles that might open with foam pool noodle covers
- Make sure the dishwasher cycle is DONE and it is off
- Turn off all house lights
- Secure any dinette table, chair(s) and extensions, if applicable
- Remove and store the glass plate, metal rack and splatter cover from the microwave
- Secure items in the refrigerator to avoid spillage
- Lock refrigerator and freezer door
- Close the overhead fan vent and ensure it is off
- Make sure your laptop and tablets are on-board and secure
- Secure the coffee pot
- Make sure the windows are closed
- Make sure the refrigerator is cold or getting cold
- Ensure all linens are on-board which will be required
- Remove any trash and secure the trash can
Hall & Mid Bathroom Area
- Latch or Close all sliding or swinging inside doors
- Secure the bathroom shower door and reposition shower supplies on floor
- Close the overhead fan vent and ensure it is off
- Ensure each cabinet door and drawers are closed and latched shut
- Raise the window shade
- Remove all loose items from the countertop
- Close toilet lid and empty the bowl, if applicable
- Secure bathroom entry door
- Make sure the window is closed
- Ensure all linens are on-board which will be required
- Remove any trash and secure the trash can
Bedroom Area
- Take any space rug off the bedroom floor
- Ensure any hanging USB cords will not interfere with slides
- Ensure bedspread and clothes are off the floor before retracting slides
- Raise all window shades
- Cover any drawer handles that might open with foam pool noodle covers
- Make sure the windows are closed
- Remove all loose items from the vanity
- Ensure all clothing items required are on-board
- Ensure all linens are on-board which will be required
Rear Bathroom
- Make sure the washer and dryer are DONE, off and the doors are both closed
- Ensure that all cabinets and drawers are closed and latched shut
- Close the overhead fan vent and ensure it is off
- Make sure the window is closed
- Raise the window shade
- Remove all loose items from the countertop
- Close toilet lid and empty the bowl, if applicable
- Secure bathroom entry door
- Ensure the closet door is closed and latched
- Ensure all linens are on-board which will be required
- Remove any trash and secure the trash can
In summary, checklists are our friends. They can be implanted in a dozen different ways, from packing the RV to campsite setup. This type of organization may seem tedious, but trust me you will become the envy of your camping friends as you demonstrate how prepared you are!

Kevin L. Vaughn – E3 RVing
RV Boot Camp – Regional Midwest/Georgia/Florida/Colorado RV Instructor
Certified AquaHot Repair Technician
Goss RV – Professional Luxury Motorcoach Chauffeur
Entegra University – Class of 2021
Spartan Academy – Class of 2021

