
Mastering RV Lithium Ion Batteries | Ultimate Guide for Boondocking
Additionally, recent shifts toward denser battery tech and hybrid charging mean even modest setups deliver more runtime than ever. For instance, a single 270Ah lithium unit now rivals three older models in capacity while occupying less space—perfect for compact rigs.
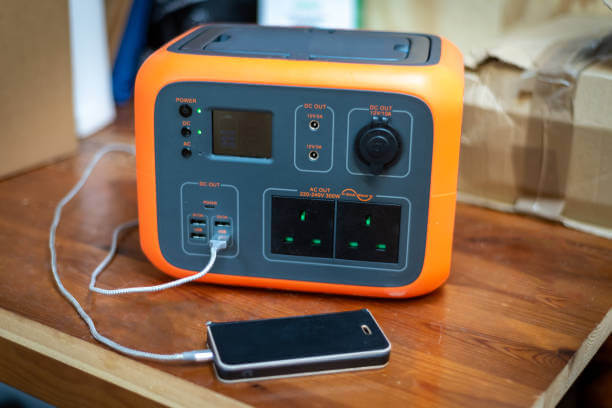
Why Switch to RV Lithium Ion Batteries?
Lead-acid batteries served well for decades, yet lithium offers lighter weight, faster charging, and deeper discharge cycles. Moreover, they eliminate the constant hum of generators during quiet evenings. One owner shared how a cricket’s chirp became their only nighttime companion after ditching propane reliance.
However, not everyone needs the switch immediately. If you’re a “Camp Queen” plugged into shore power 90% of the time, stick with lead-acid for now. But for boondockers exploring hidden spots, lithium opens doors to spontaneous adventures.
- Depth of Discharge: Use 80-90% of capacity vs. 50% with lead-acid.
- Charge Speed: Full recharge in 2-3 hours vs. 8+ hours.
- Lifespan: 3,000-5,000 cycles vs. 500-1,000.
Additionally, lithium battery basics at E3 Camping reveal how built-in BMS protects against overcharge and cold weather damage.
Charging Sources for RV Lithium Ion Batteries
Proper charging prevents headaches down the road. Therefore, match your charger to lithium profiles reaching 14.4-14.6V. Standard converters top out at 13.6V, leaving cells undercharged at 40% capacity.
However, alternator charging introduces variables. Vehicle alternators fluctuate with RPM, rarely hitting consistent 14.4V. Voltage flows downhill, so a 13.6V alternator can’t fully charge a 14V battery bank.
DC-to-DC Chargers vs. Battery Isolation Managers
A Battery Isolation Manager (BIM) acts like a simple relay, closing for 20 minutes then opening for 15. This allows full alternator output in bursts but risks overheating components.
Therefore, opt for a DC-to-DC charger instead. It steps up variable input to steady 14.4V while limiting output to 30-60A, protecting both vehicle and house batteries. Install near the battery bank, away from engine heat, using properly gauged cables.
For towables, run dedicated cables from the truck battery through an Anderson connector. Additionally, add a battery protect or ignition signal wire to prevent draining the starter battery when parked.
Learn more about DC-to-DC chargers explained for travel trailers.
Conducting an Energy Audit for Your Rig
Before buying batteries, calculate actual needs. Start with an energy audit listing every device’s wattage and daily usage hours. For example:
- LED TV: 100W × 4 hours = 400Wh
- 12V Refrigerator: 50W × 24 hours = 1,200Wh
- Microwave: 1,200W × 0.5 hours = 600Wh
Total: 2,200Wh daily. A 100Ah lithium battery stores ~1,200Wh usable (12V × 100Ah × 0.9 DoD). Therefore, you’d need at least two batteries for one day of autonomy.
However, air conditioning changes everything. A 13,500 BTU unit draws ~1,500W running, limiting runtime to under an hour per 100Ah battery. Soft-start kits reduce surge, but plan accordingly.
Recent data from the RV Industry Association shows 68% of new Class B vans now ship with lithium standard, reflecting growing boondocking demand.1
How Many RV Lithium Ion Batteries Do You Need?
Budget often dictates the answer, but lifestyle matters more. Weekend warriors manage with 200-300Ah. Full-timers running AC or Starlink aim for 600Ah+.
Additionally, denser packs like Battle Born’s 270Ah Game Changer fit in spaces once holding two 100Ah units. This trend toward higher energy density per footprint revolutionizes van conversions.
Therefore, start small and expand. Install oversized cabling from day one—#2/0 gauge handles future growth. Position batteries to leave room for parallels.
Explore battery bank sizing tools to model scenarios.
Inverters: The Heart of Lithium Systems
Modern inverter/chargers with pass-through and hybrid functions simplify life. Plug shore power into the inverter; it passes 120V untouched when available, switching seamlessly in 1/16th second during outages.
However, size matters. A 2,000W unit runs essentials; 3,000W handles one AC. Hybrid mode supplements 15A shore power with battery output for 20A loads without tripping breakers.
For example, one couple mooch-docked at a relative’s 15A outlet, running their 13,500 BTU AC flawlessly via hybrid inversion.
Check best RV inverters for 2025 comparisons.
Solar Integration and Controllers
No panel outputs exactly 12V—voltage varies with sunlight and temperature. MPPT controllers convert high-voltage strings efficiently, boosting amps while matching battery needs.
Additionally, series wiring raises voltage for thinner cables over long runs. Parallel keeps voltage low but increases current. Balance based on controller limits.
OEM solar packages often include one 100W panel and a basic controller—barely a battery maintainer. Aftermarket systems scale to 1,000W+ for serious boondocking.
The National Park Service reports a 40% increase in dispersed camping since 2020, driving solar adoption.2
Winter Storage and Maintenance Tips
Cold climates demand care. Disconnect lead-acid batteries and use a trickle charger indoors. Lithium tolerates freezing but charges slowly below 32°F—warm packs or use built-in heaters.
However, never store any battery at 0% SoC. Keep lithium at 50-60% for months-long storage. Cycle every 3-6 months.
Installation Considerations and Finding Experts
Dealers lag marine counterparts by 20 years in solar/lithium expertise. Therefore, seek certified installers through training networks. Ask about wire sizing, fusing, and future expansion.
Additionally, avoid maxing OEM systems. Aftermarket builds use heavier gauge wire and strategic battery placement for seamless upgrades.
Connect with installers via E3 Rving’s installer directory.
Cost Analysis and ROI
Average lithium upgrade: $7,000-$16,000. At $45/night campground fees, boondocking 150+ nights annually breaks even in 2-3 years. Intangible benefits—silence, freedom—priceless.
However, start with essentials. Run your generator first to baseline usage, then replace runtime with solar/battery equivalents.
Conclusion: Power Your Adventures
Mastering RV lithium ion batteries transforms camping from tethered to liberated. Conduct an energy audit, choose compatible charging, and scale gradually. Therefore, embrace the gateway drug of off-grid power—one silent night at a time.
For more E3 Camping and RVing resources be sure to visit: https://e3rving.com