
Step-by-Step Instructions For Building and Installing a Custom Flat Mount Starlink System on Your RV
Staying connected on the road has never been easier, thanks to Starlink’s satellite internet service. For RV enthusiasts, having a reliable and high-speed internet connection can transform travel experiences, enabling everything from streaming movies to remote work. In this guide, I’ll walk you through building and installing a custom flat mount system for the Starlink Gen 2 satellite receiver using a 3D printer. Along the way, we’ll explore the pros of this setup and why I chose this method over other flat mount options.
Materials Needed
Before diving into the build process, gather the following materials:
- 3D Printer and Filament: PLA or PETG recommended for durability.
- Starlink Gen 2 Satellite Receiver
- Aluminum Angle Irons
- Screws and Fasteners: Suitable for your RV’s roof material.
- End Caps
- Silicone Sealant AND Dicore
- Electrical Tape and Duct Tape
- Spray Paint: UV-resistant for outdoor protection.
- Tools: Screwdrivers, wire cutters, glue, etc.
Why This Custom Build?
There are plenty of flat mount options available for Starlink, each designed to securely attach the satellite receiver to an RV roof. So why build one yourself? For me, the decision was straightforward. I own a 3D printer, and by creating my own mount, I could save money—this project cost me about $18 in materials. Beyond the cost savings, the custom build allowed me to tailor the mount specifically to my needs and ensure it fit perfectly on my RV.
Step-by-Step Guide
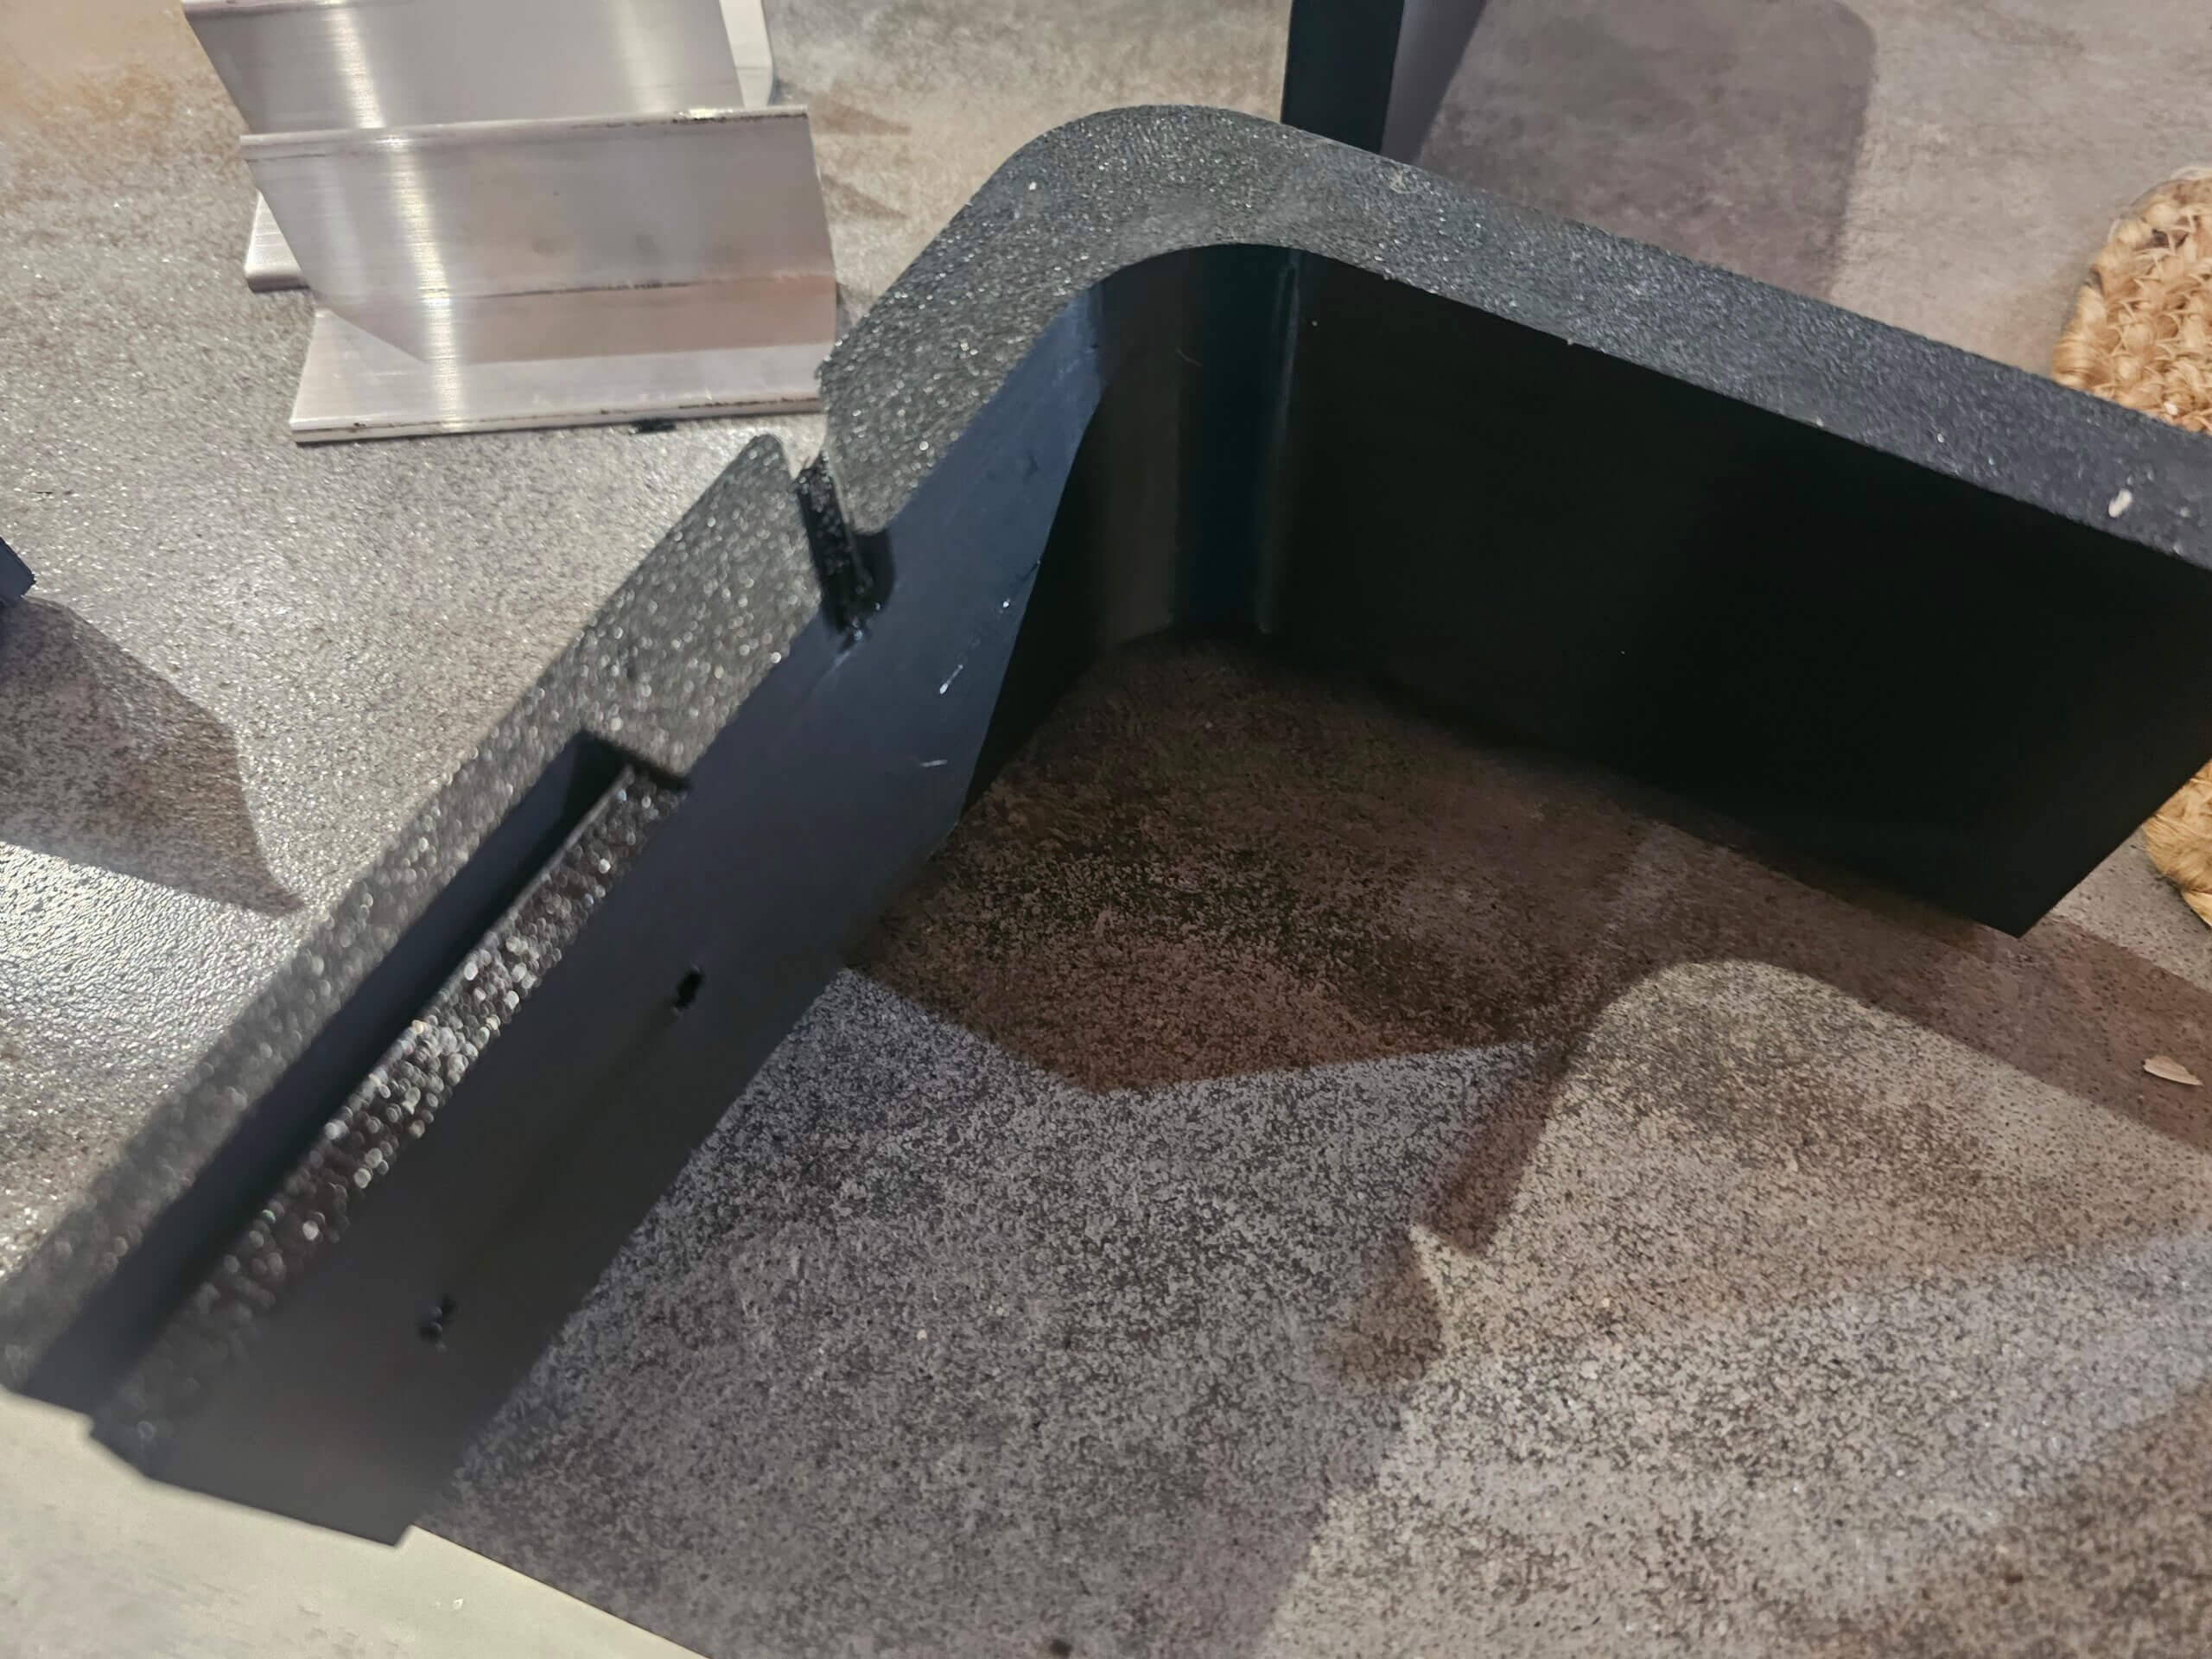
1. Printing the Mount Parts
The foundation of your flat mount system begins with 3D printing the necessary components. Due to the size limitations of most 3D printers, you’ll need to print the mount in six 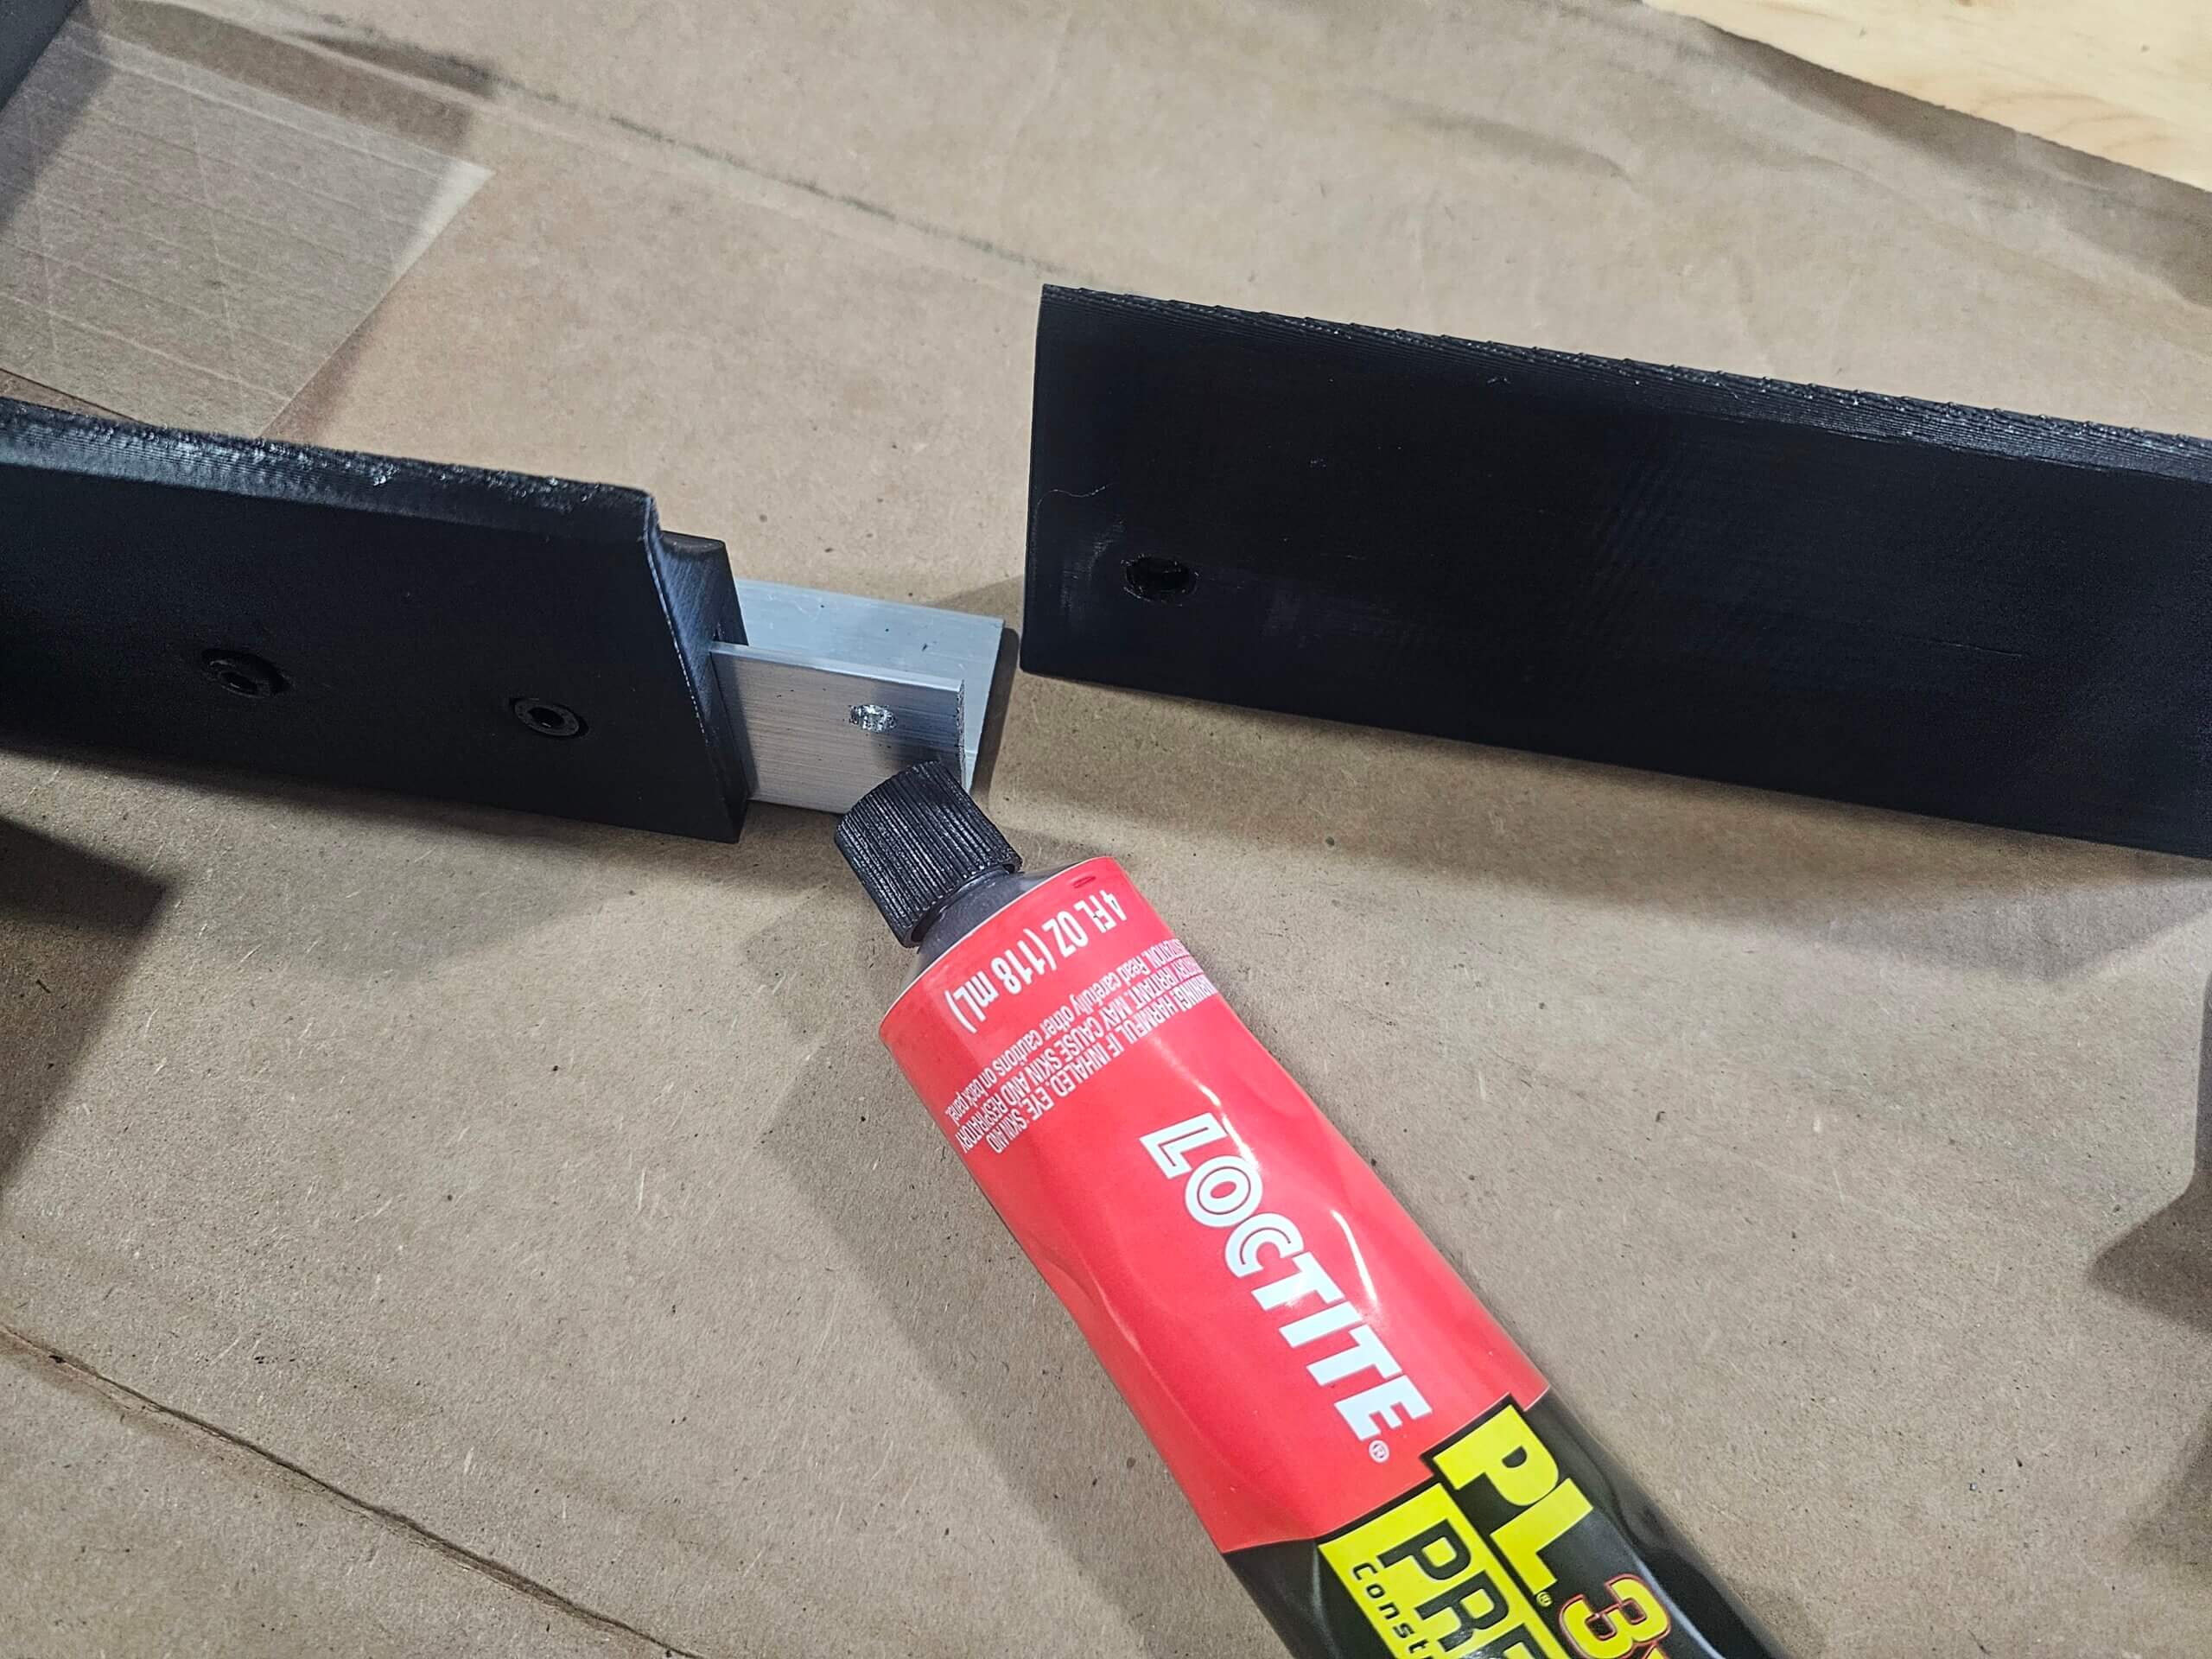 separatepieces. You can download the required 3D print files from the provided link [insert link here]. Ensure you use durable filament like PLA or XPLA to withstand outdoor conditions.
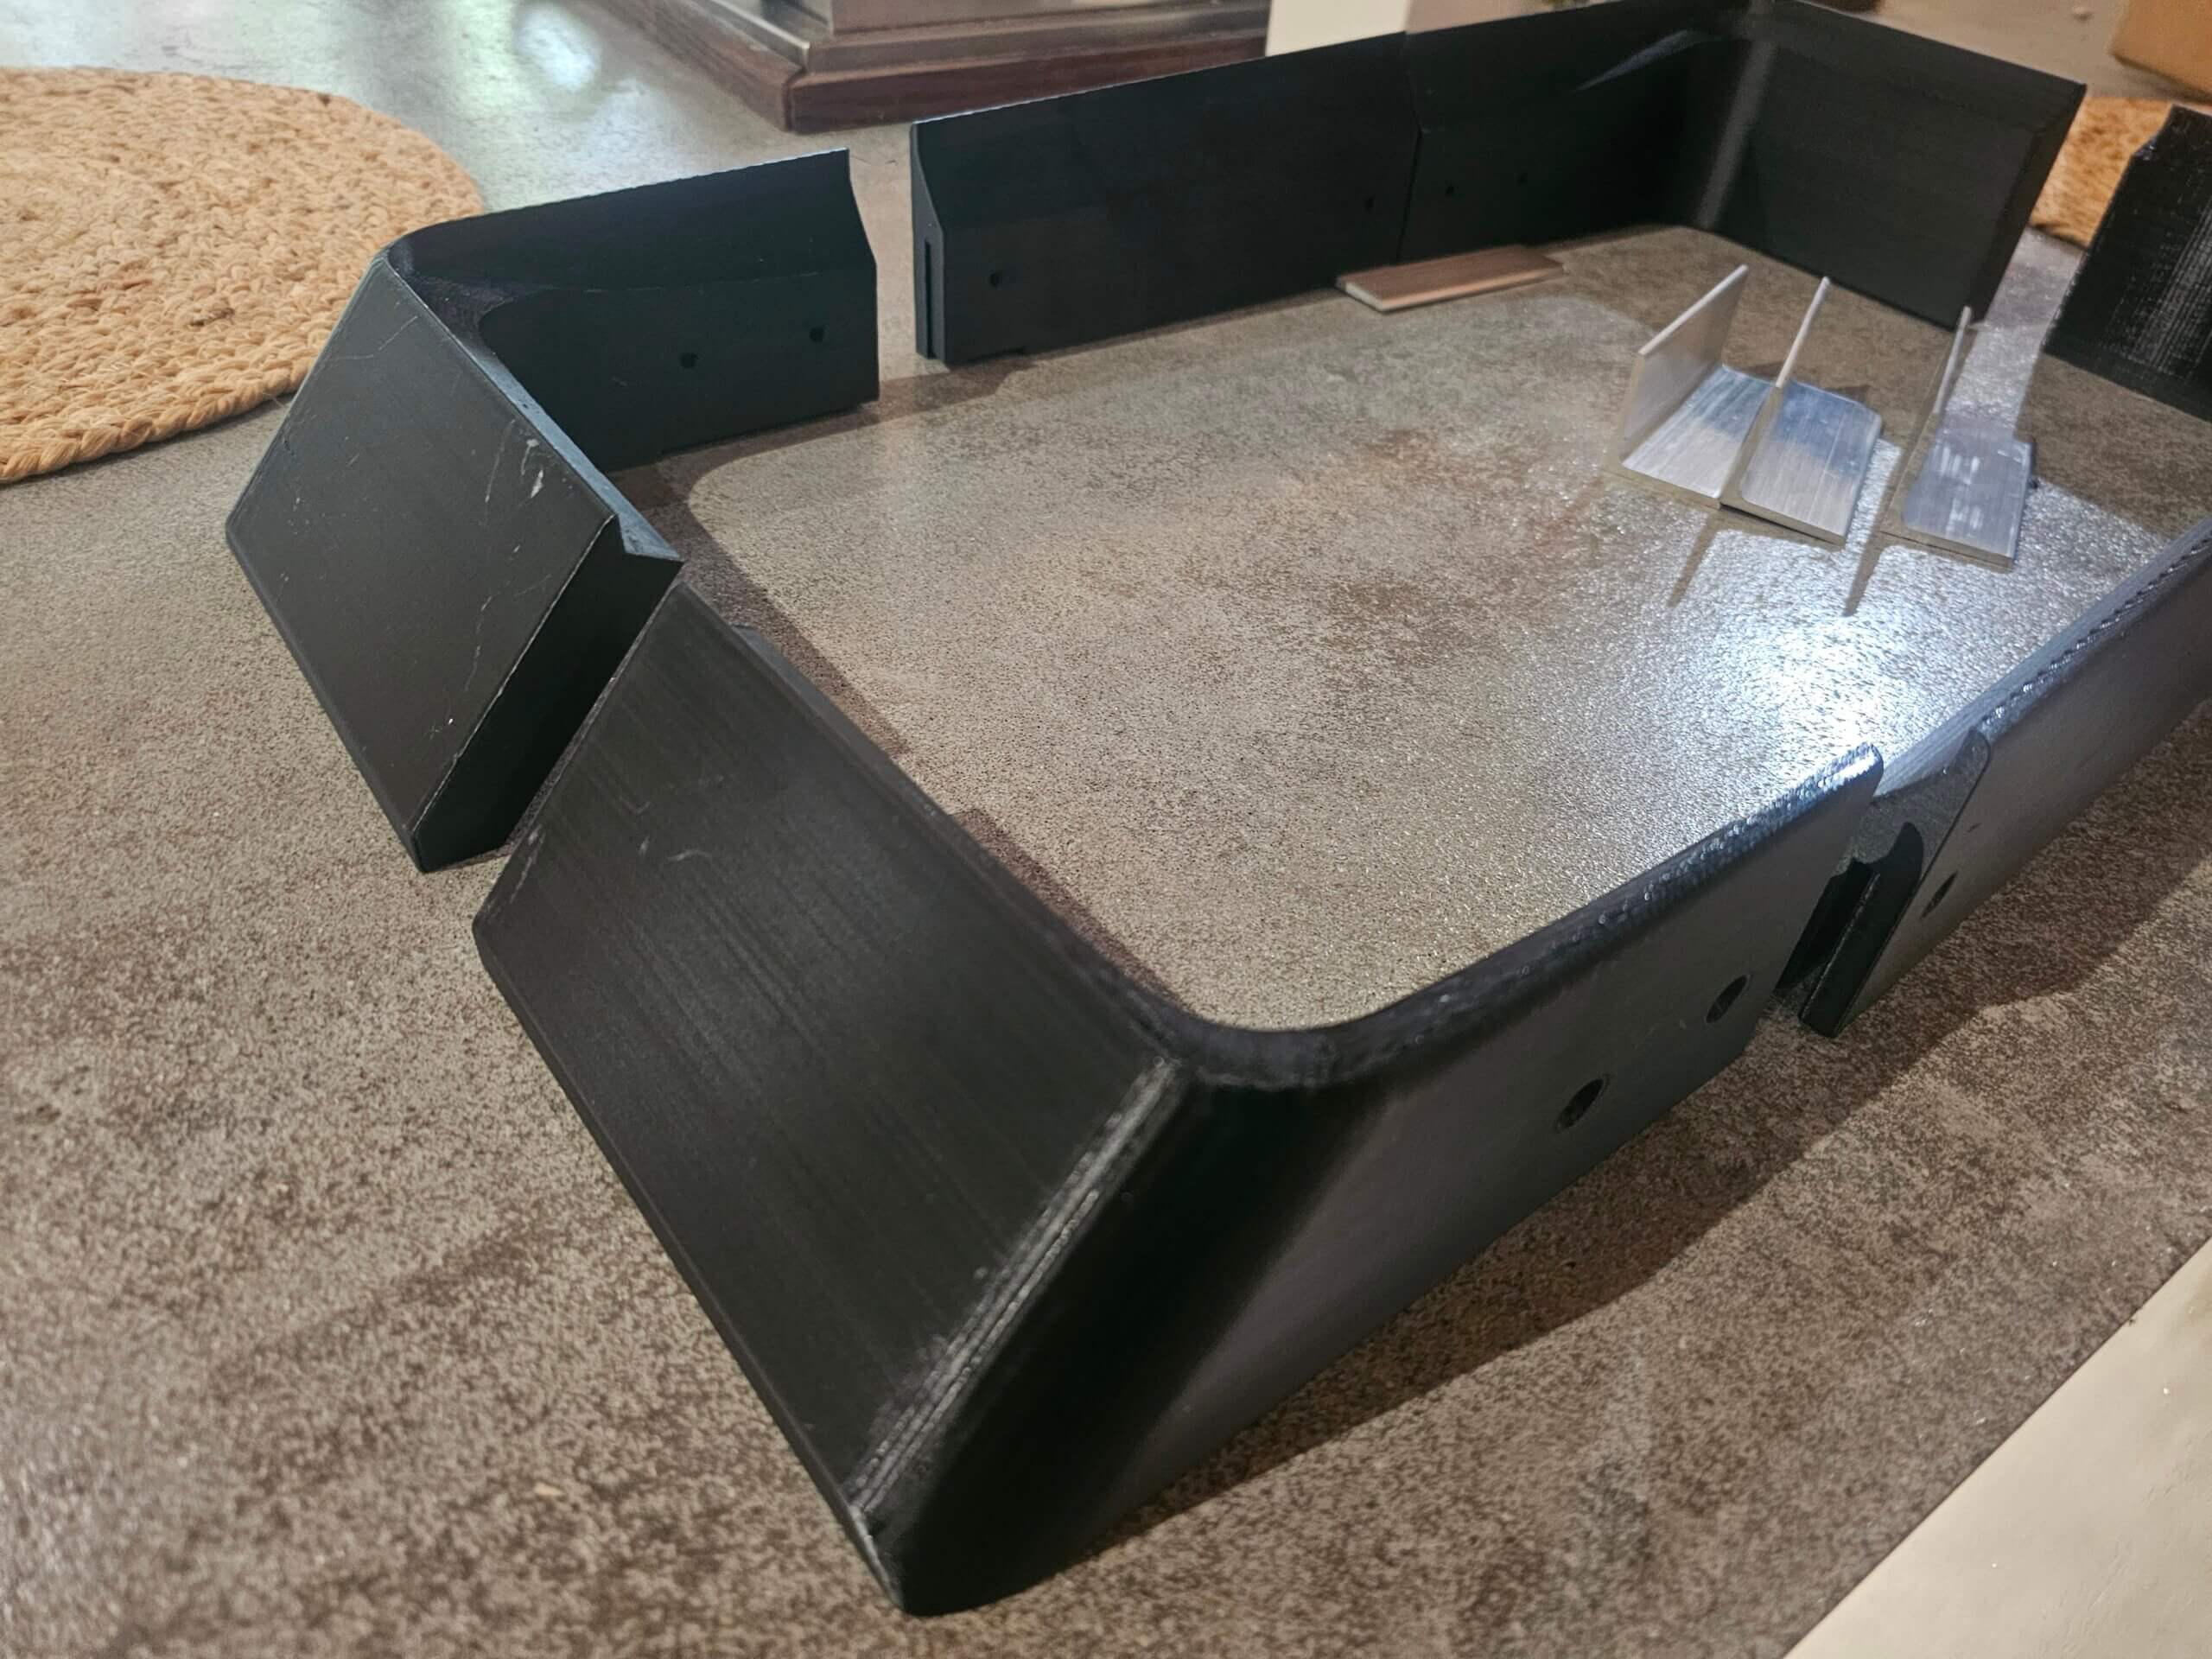
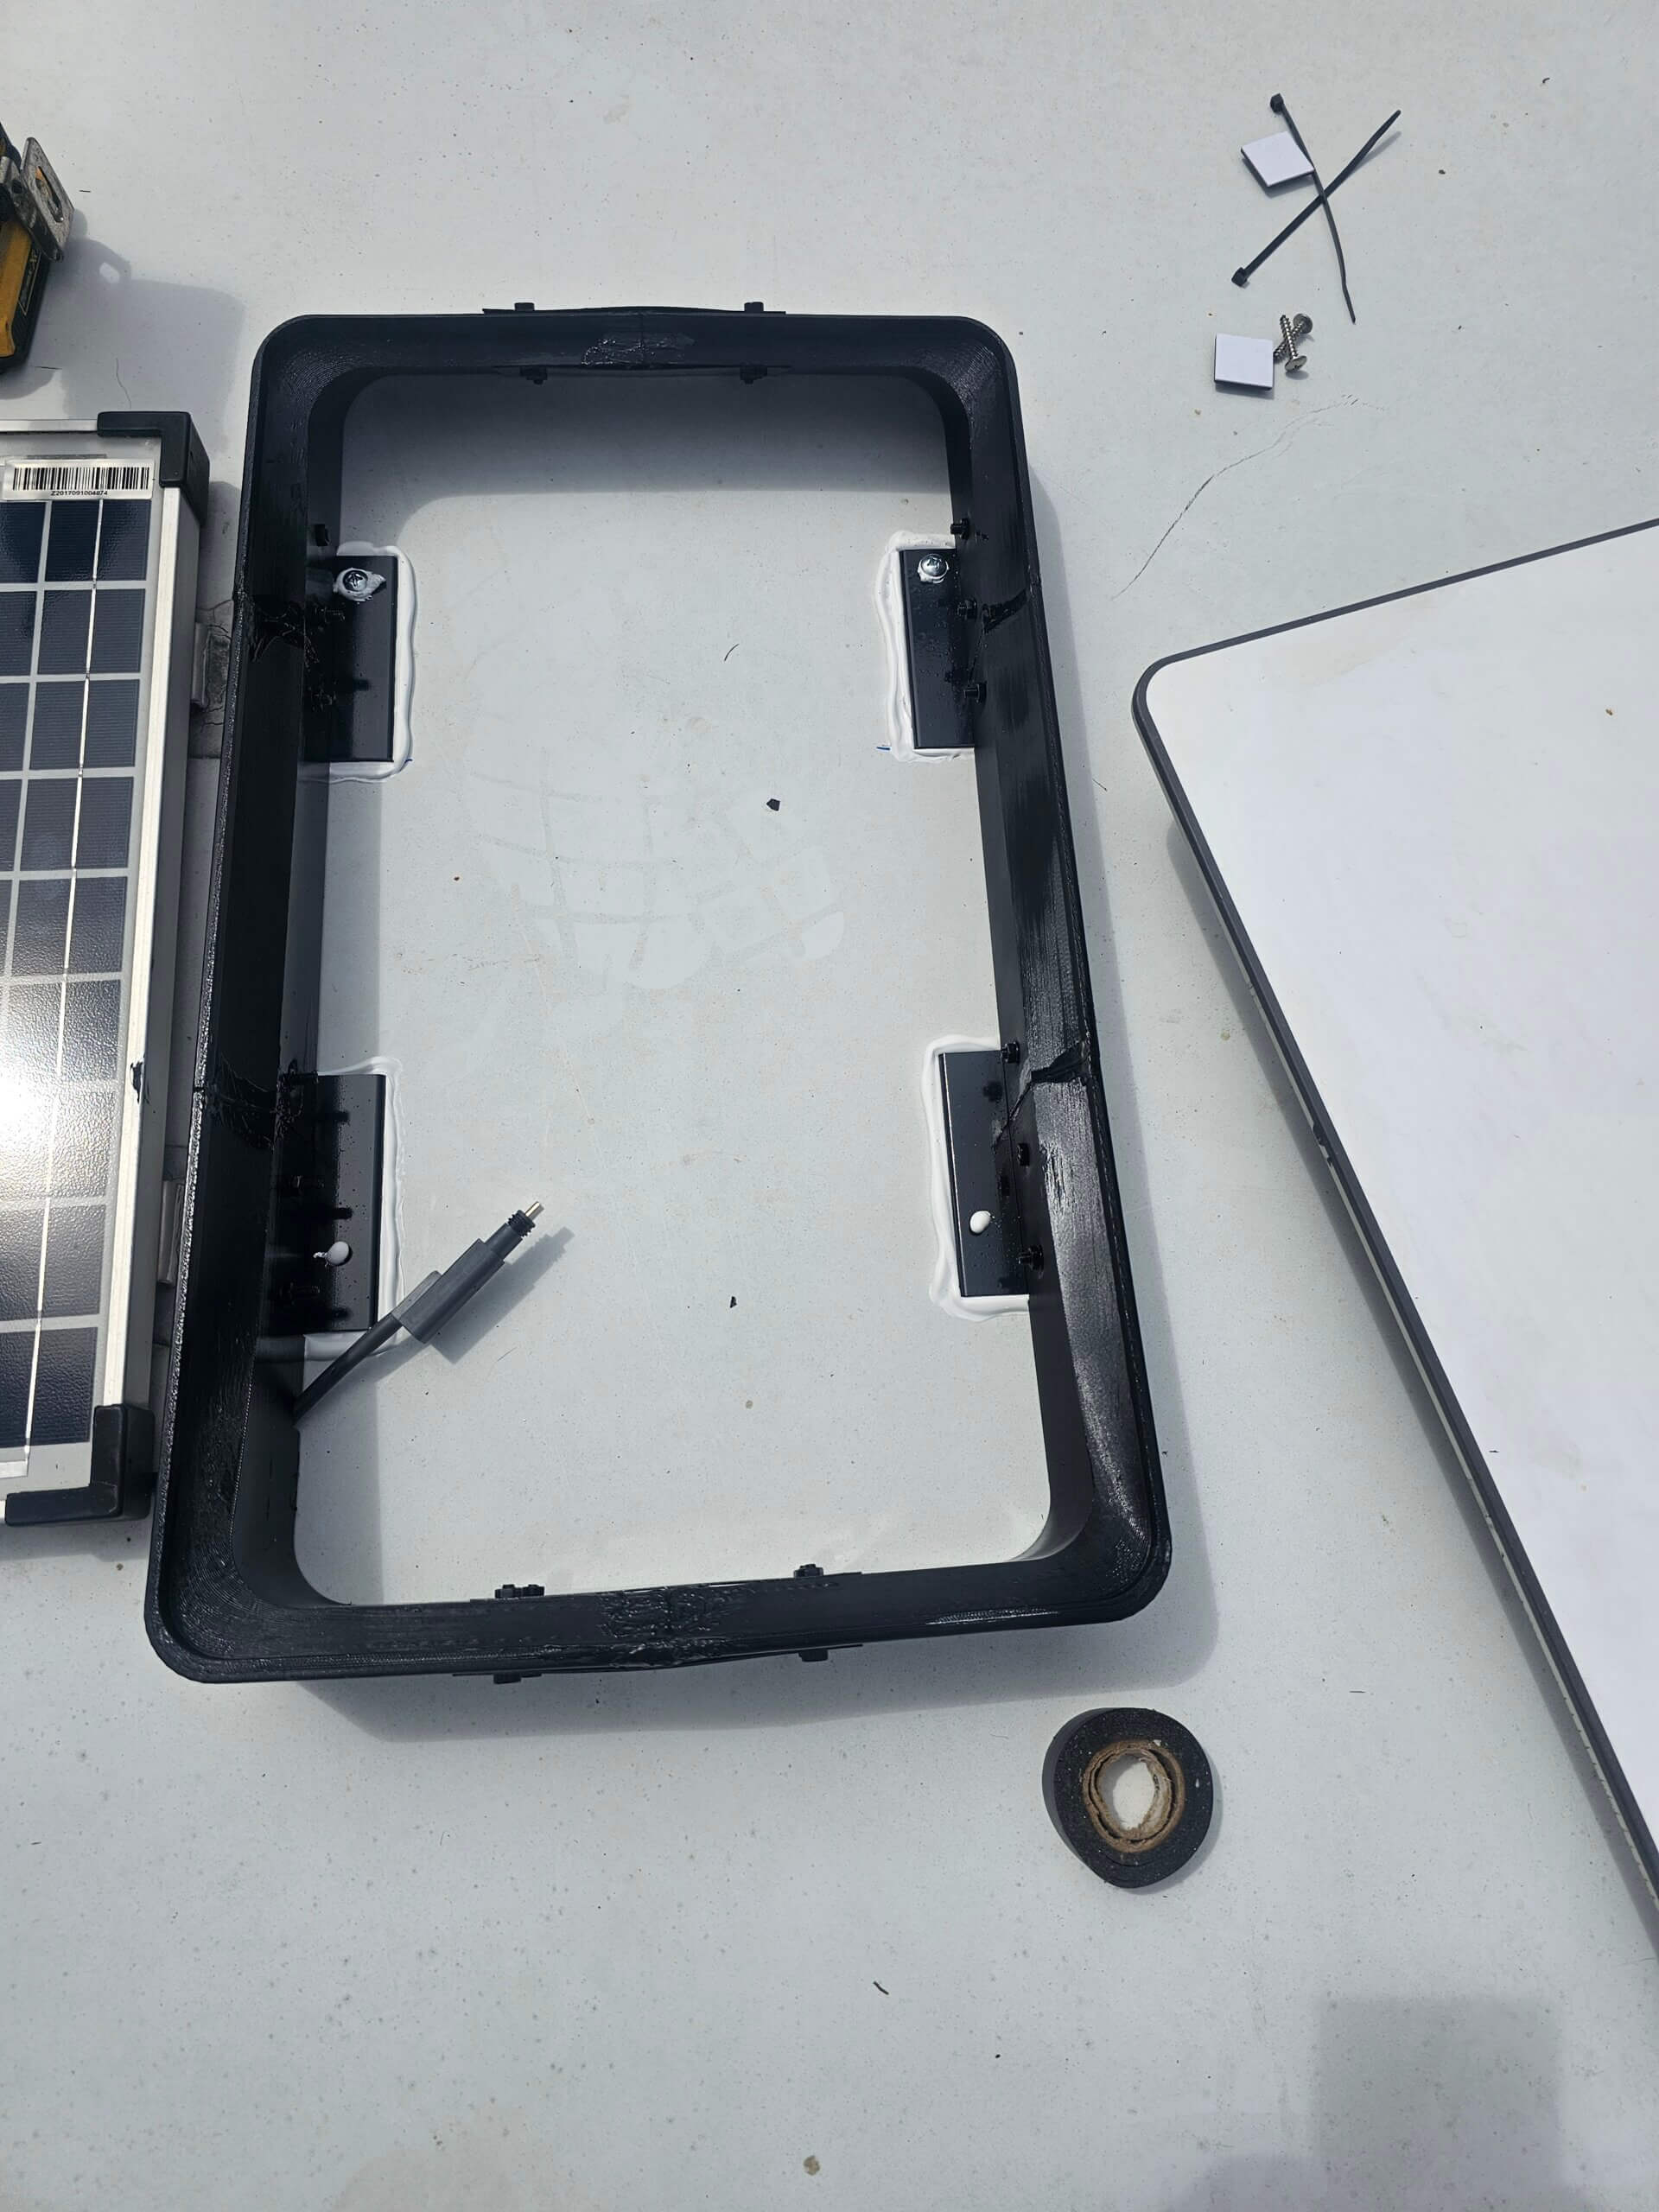
2. Assembling the Mount
Once all pieces are printed, assemble them using simple aluminum angle irons. These iron pieces connect the printed parts and provide structural integrity. Secure the assembled mount with screws to attach it firmly to the RV roof.
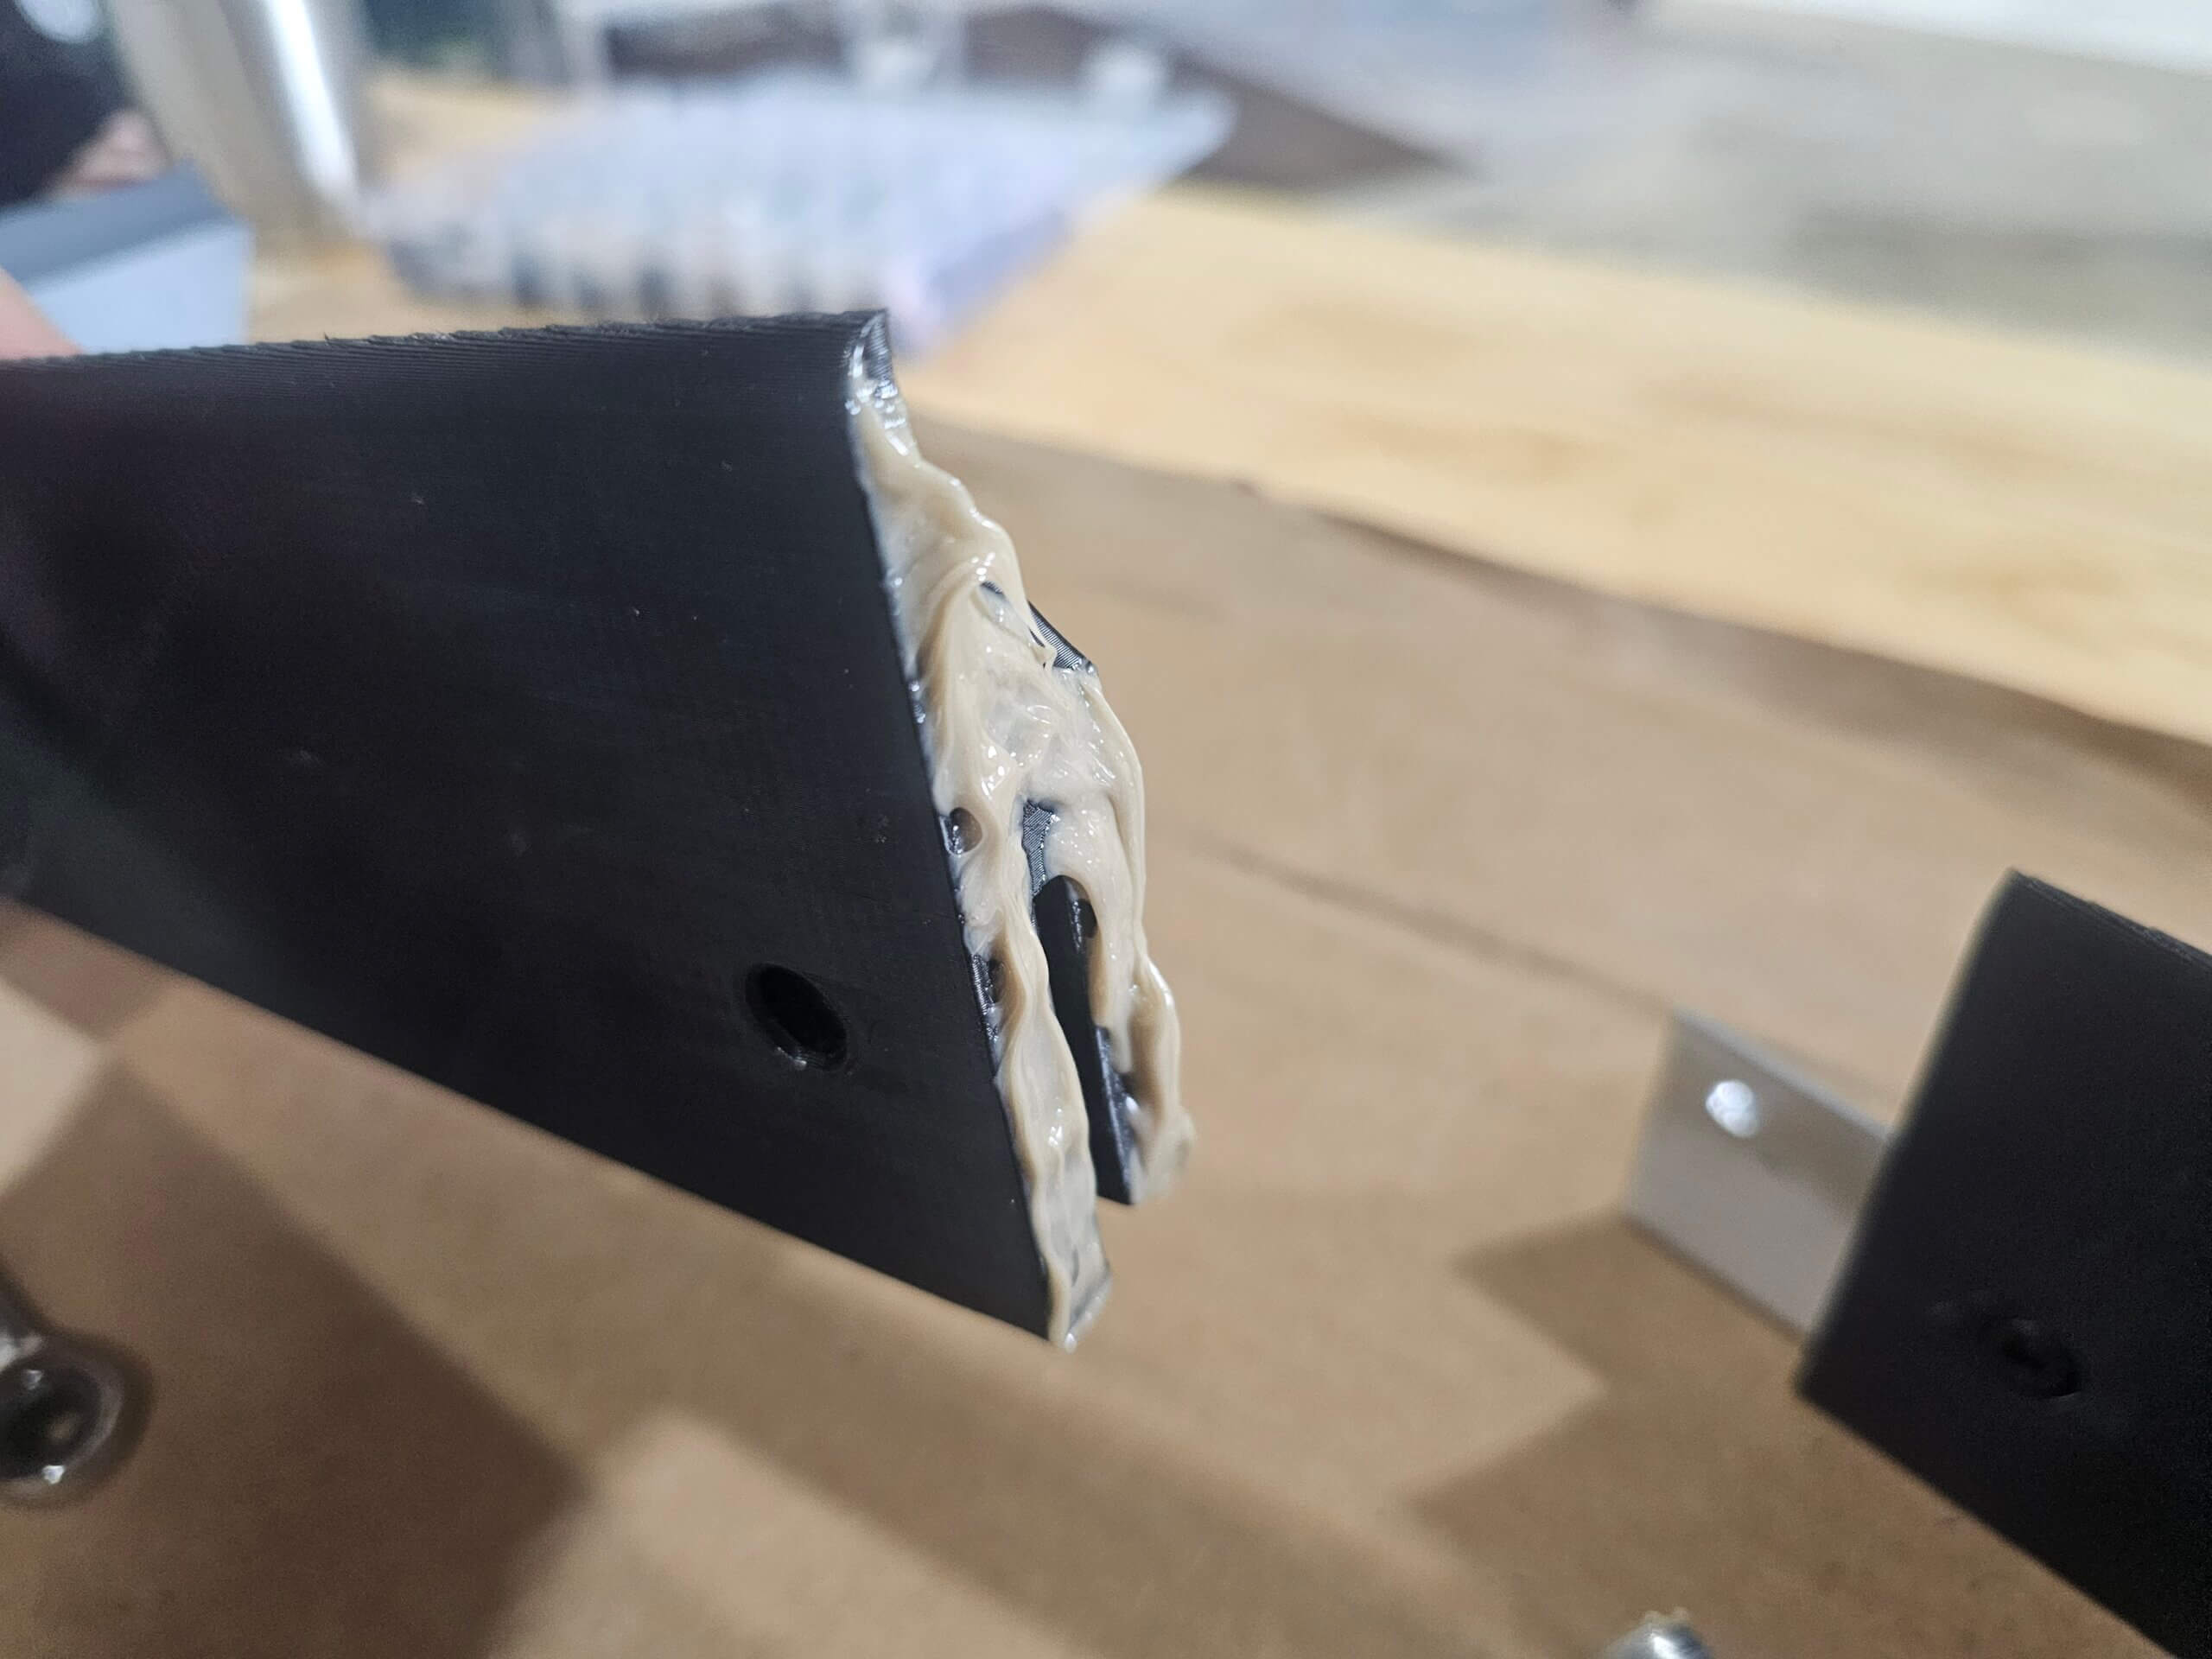
Tip: Applying glue to the joints and attaching brackets can offer extra support, ensuring the mount holds the satellite unit securely even in windy conditions.

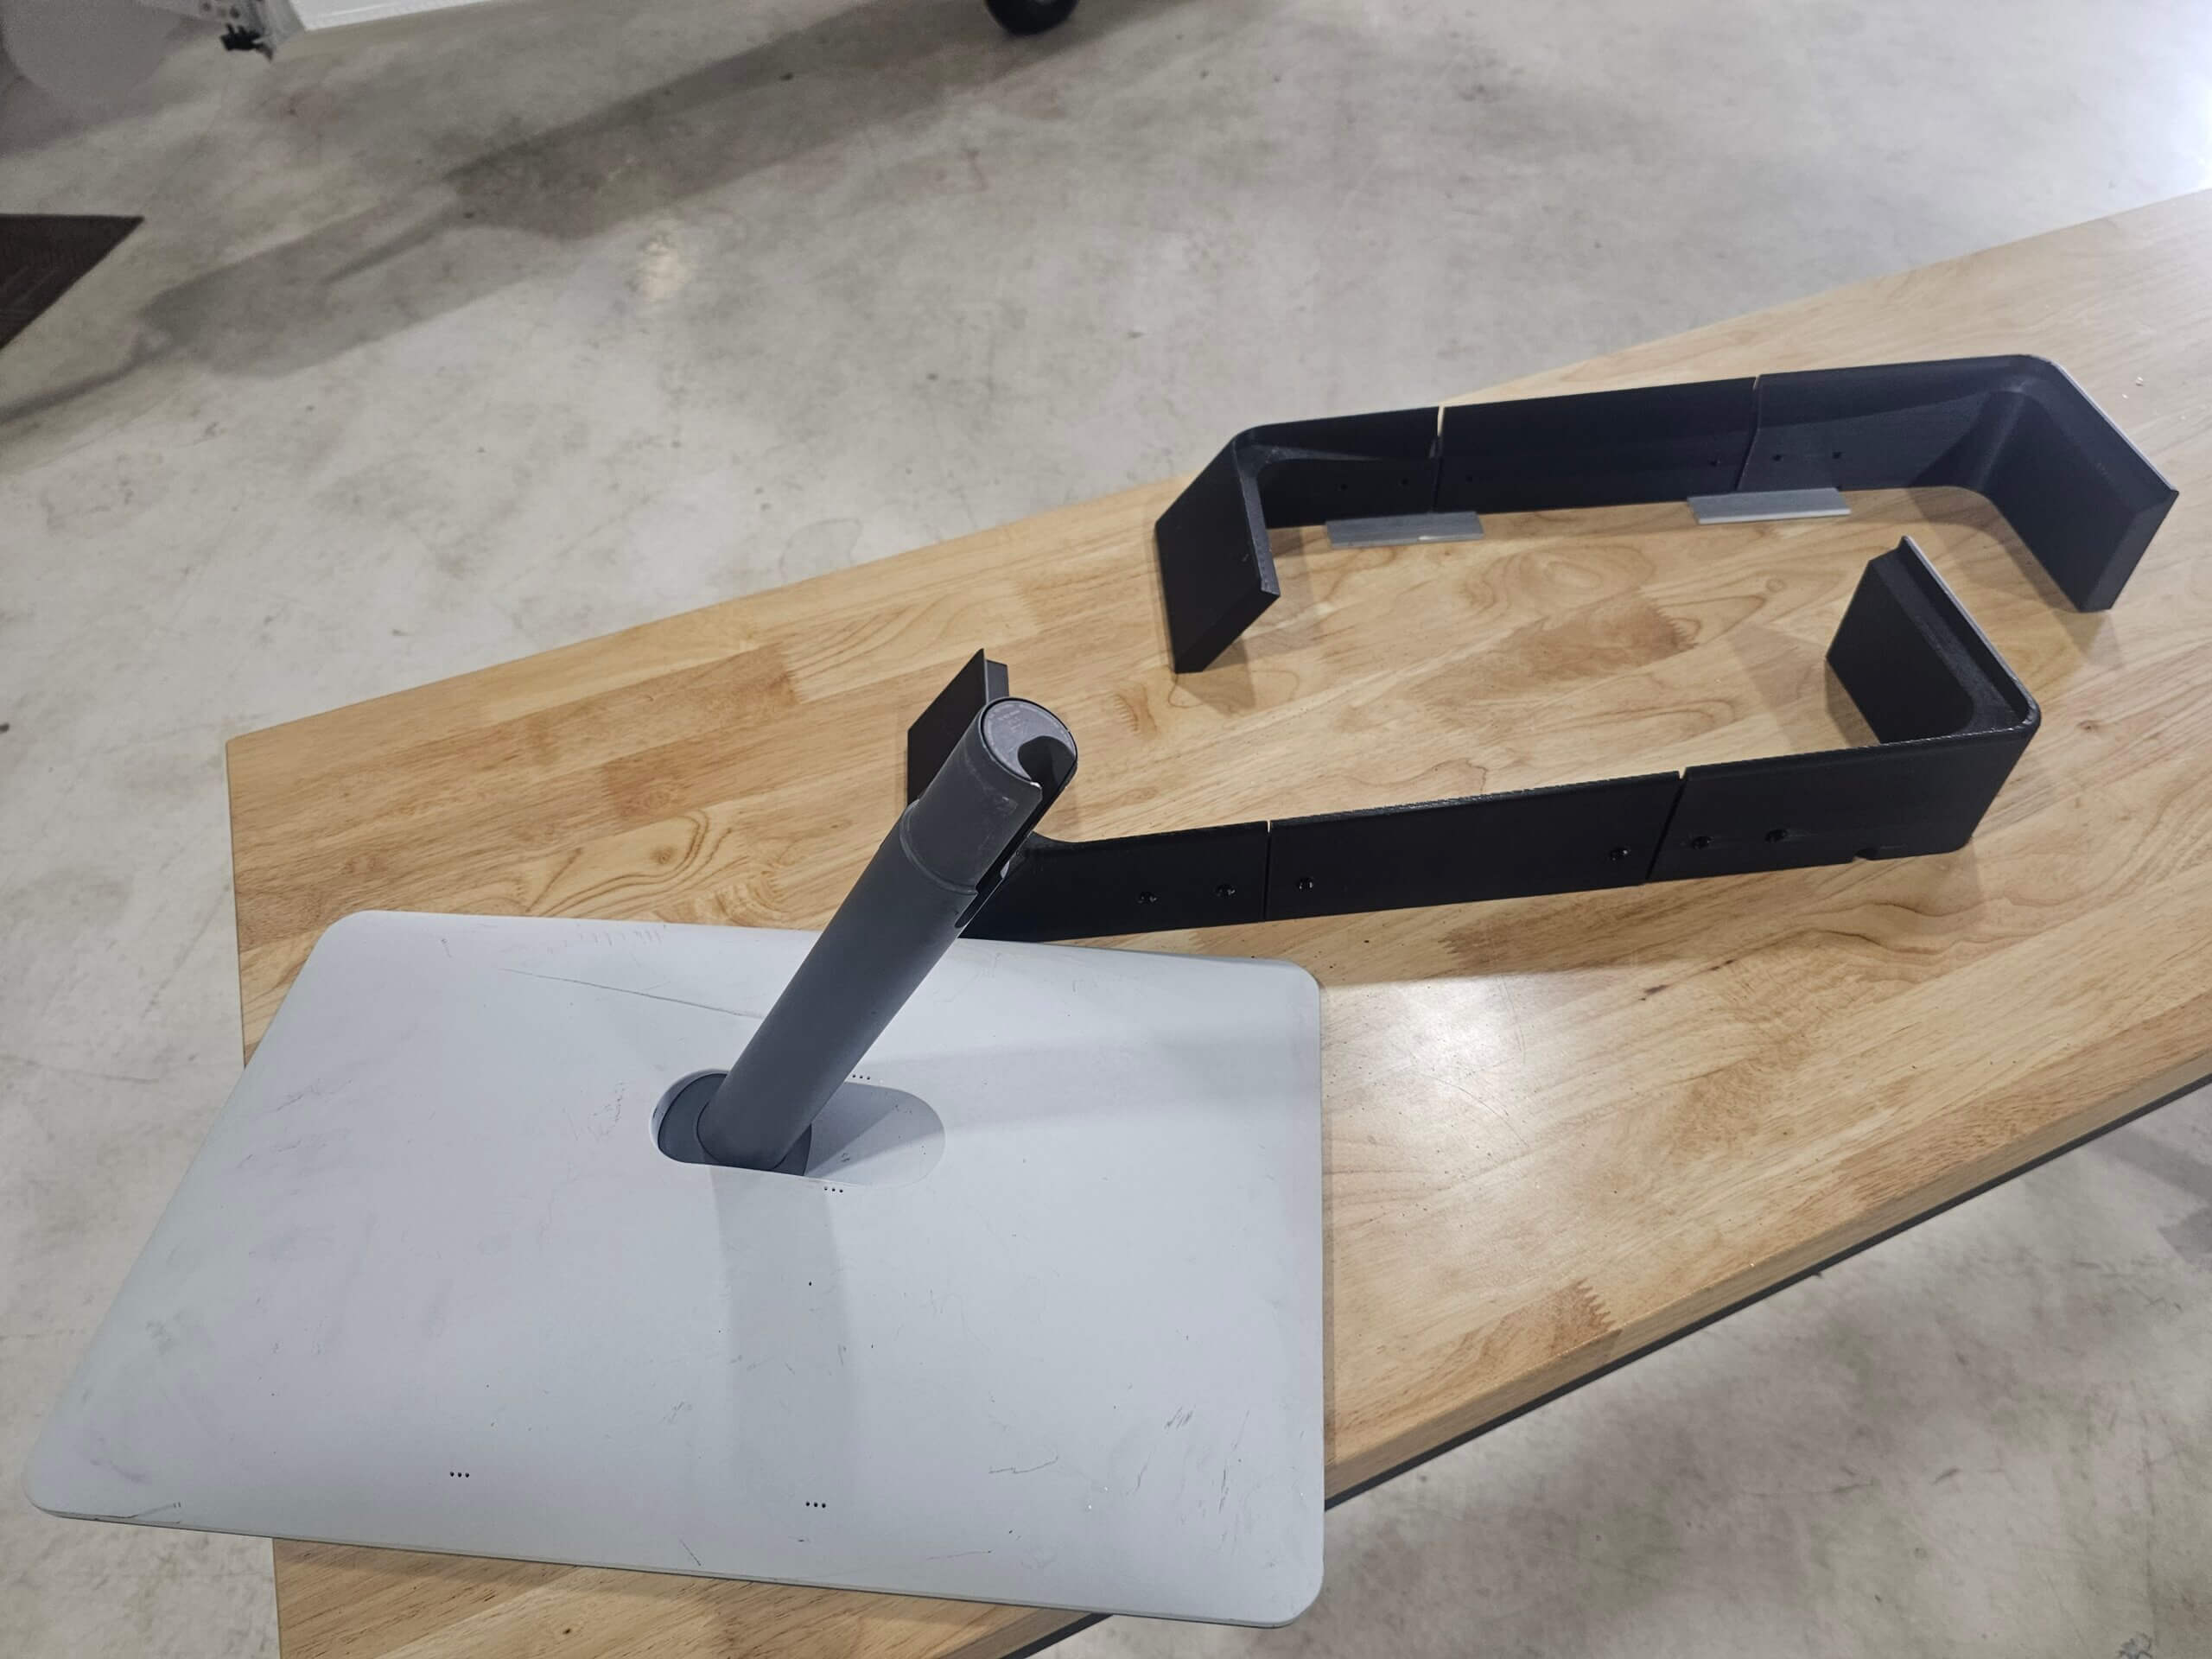
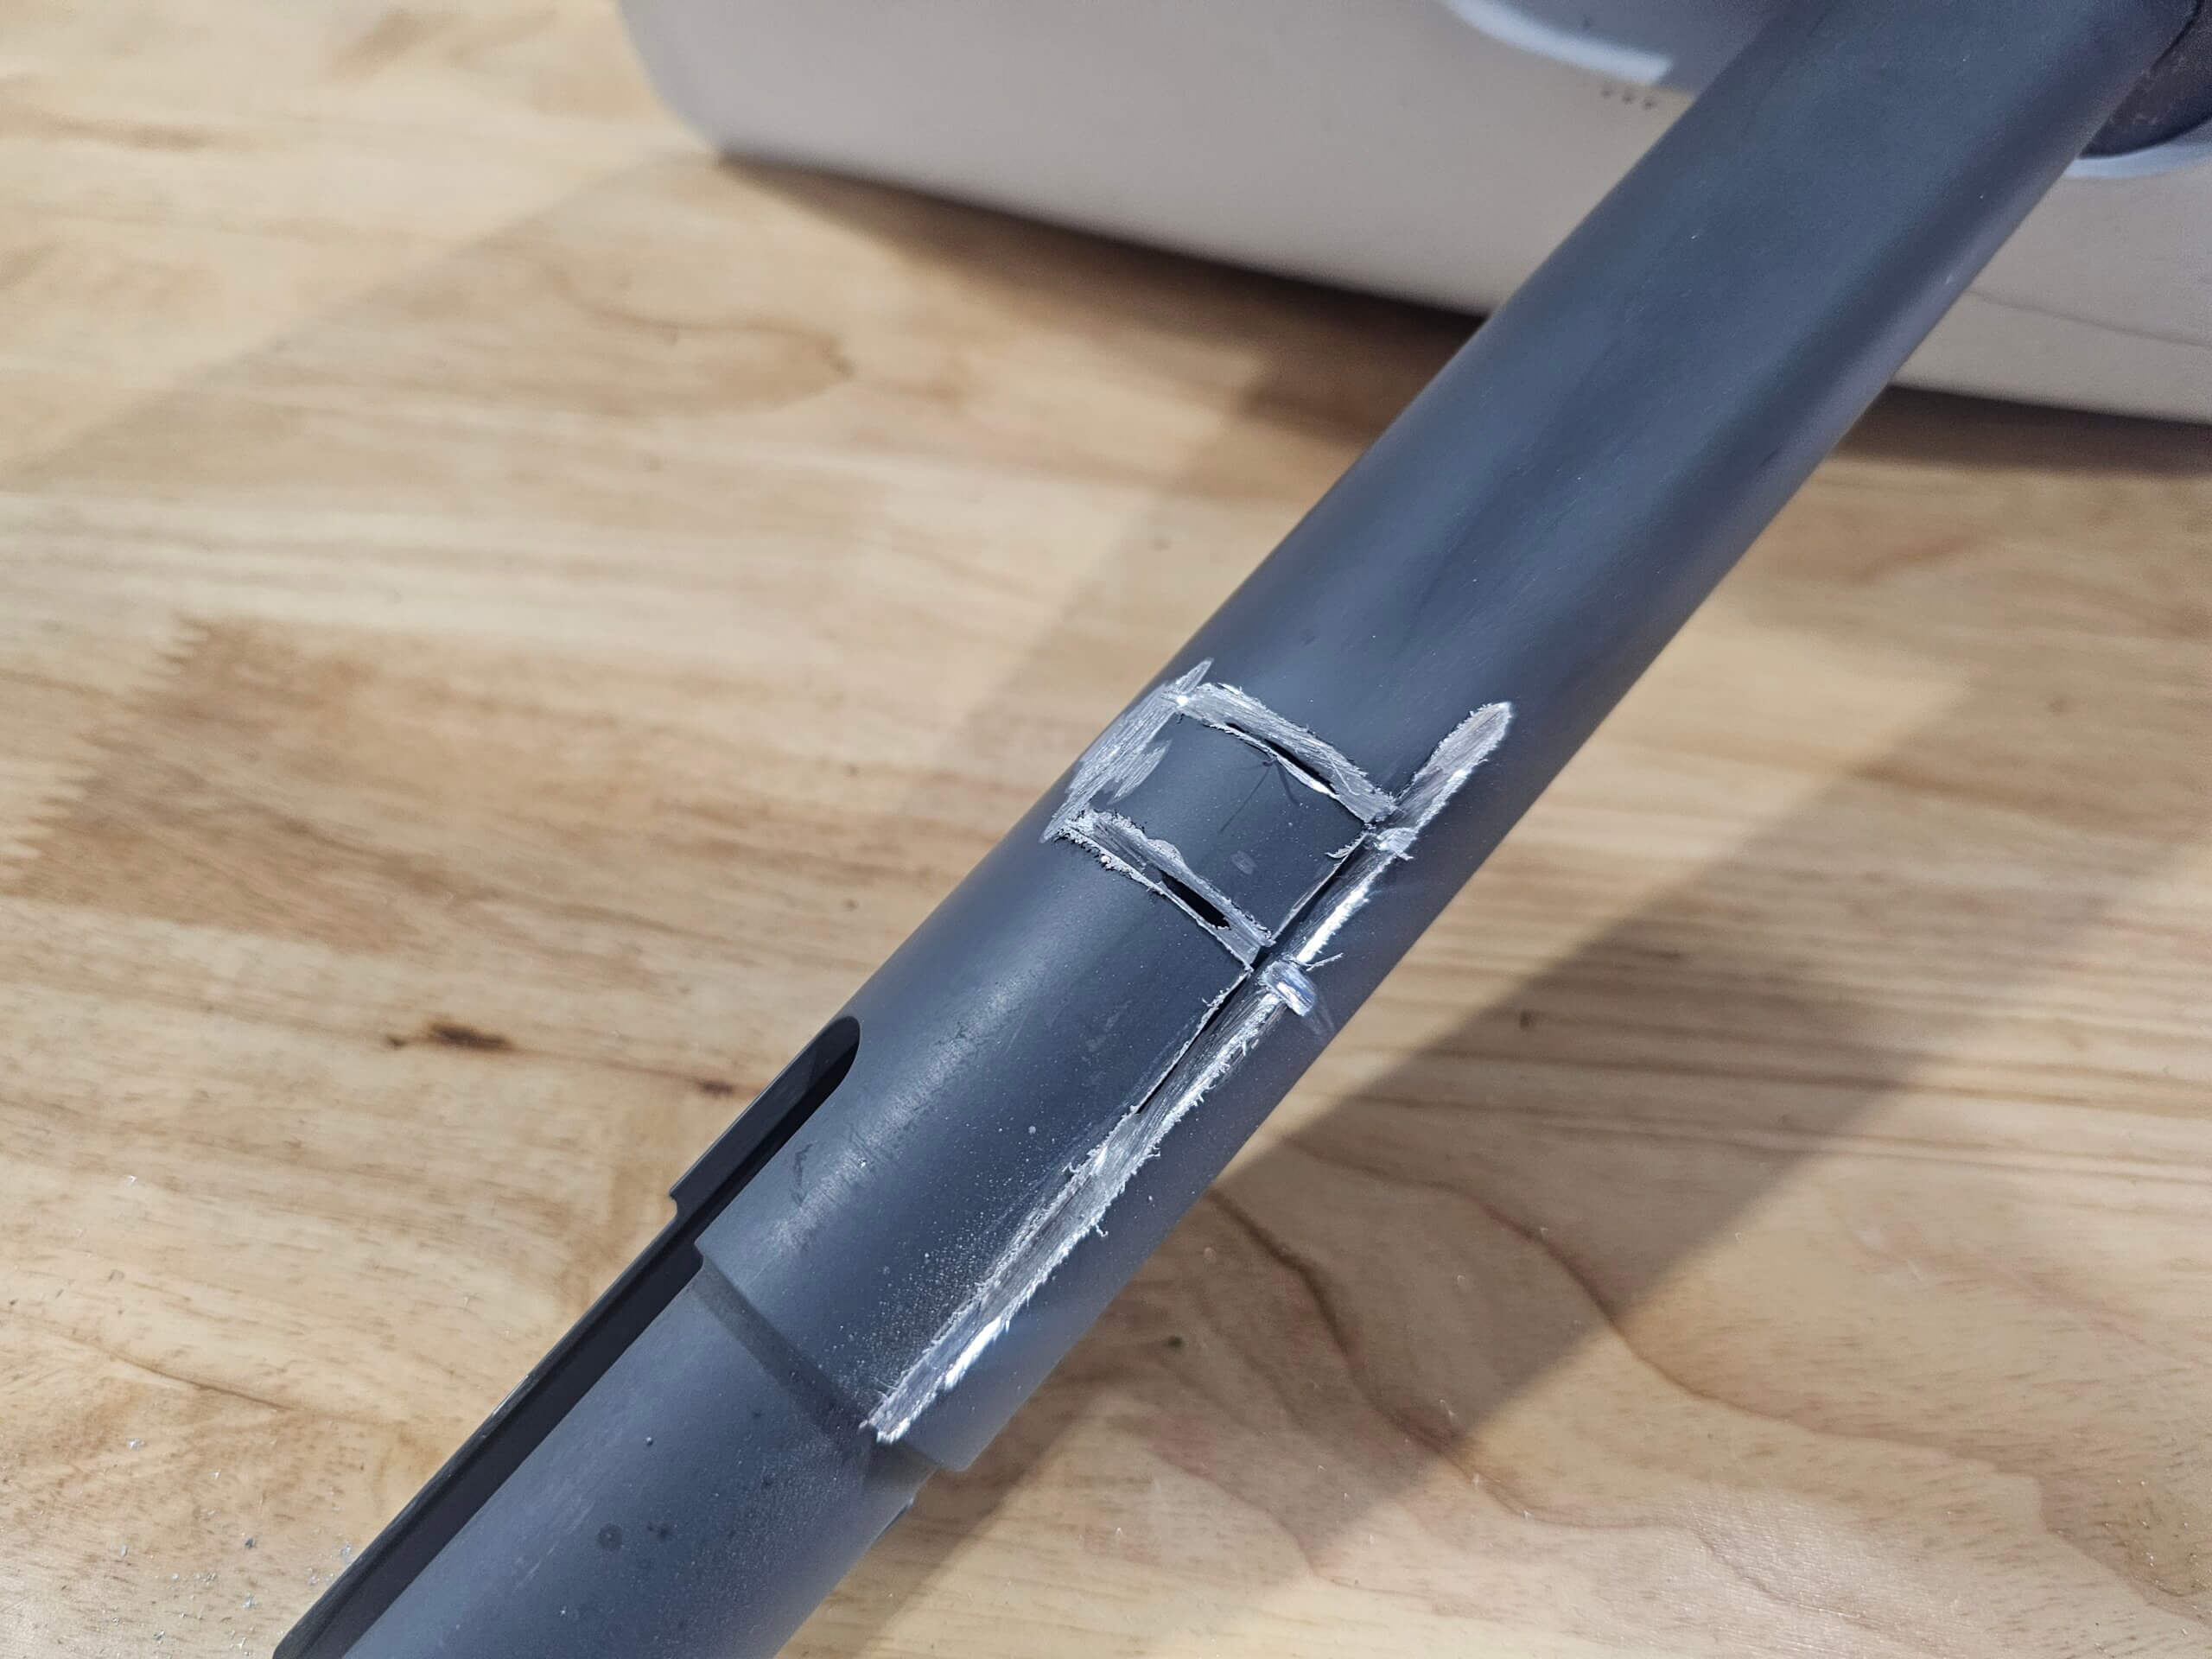
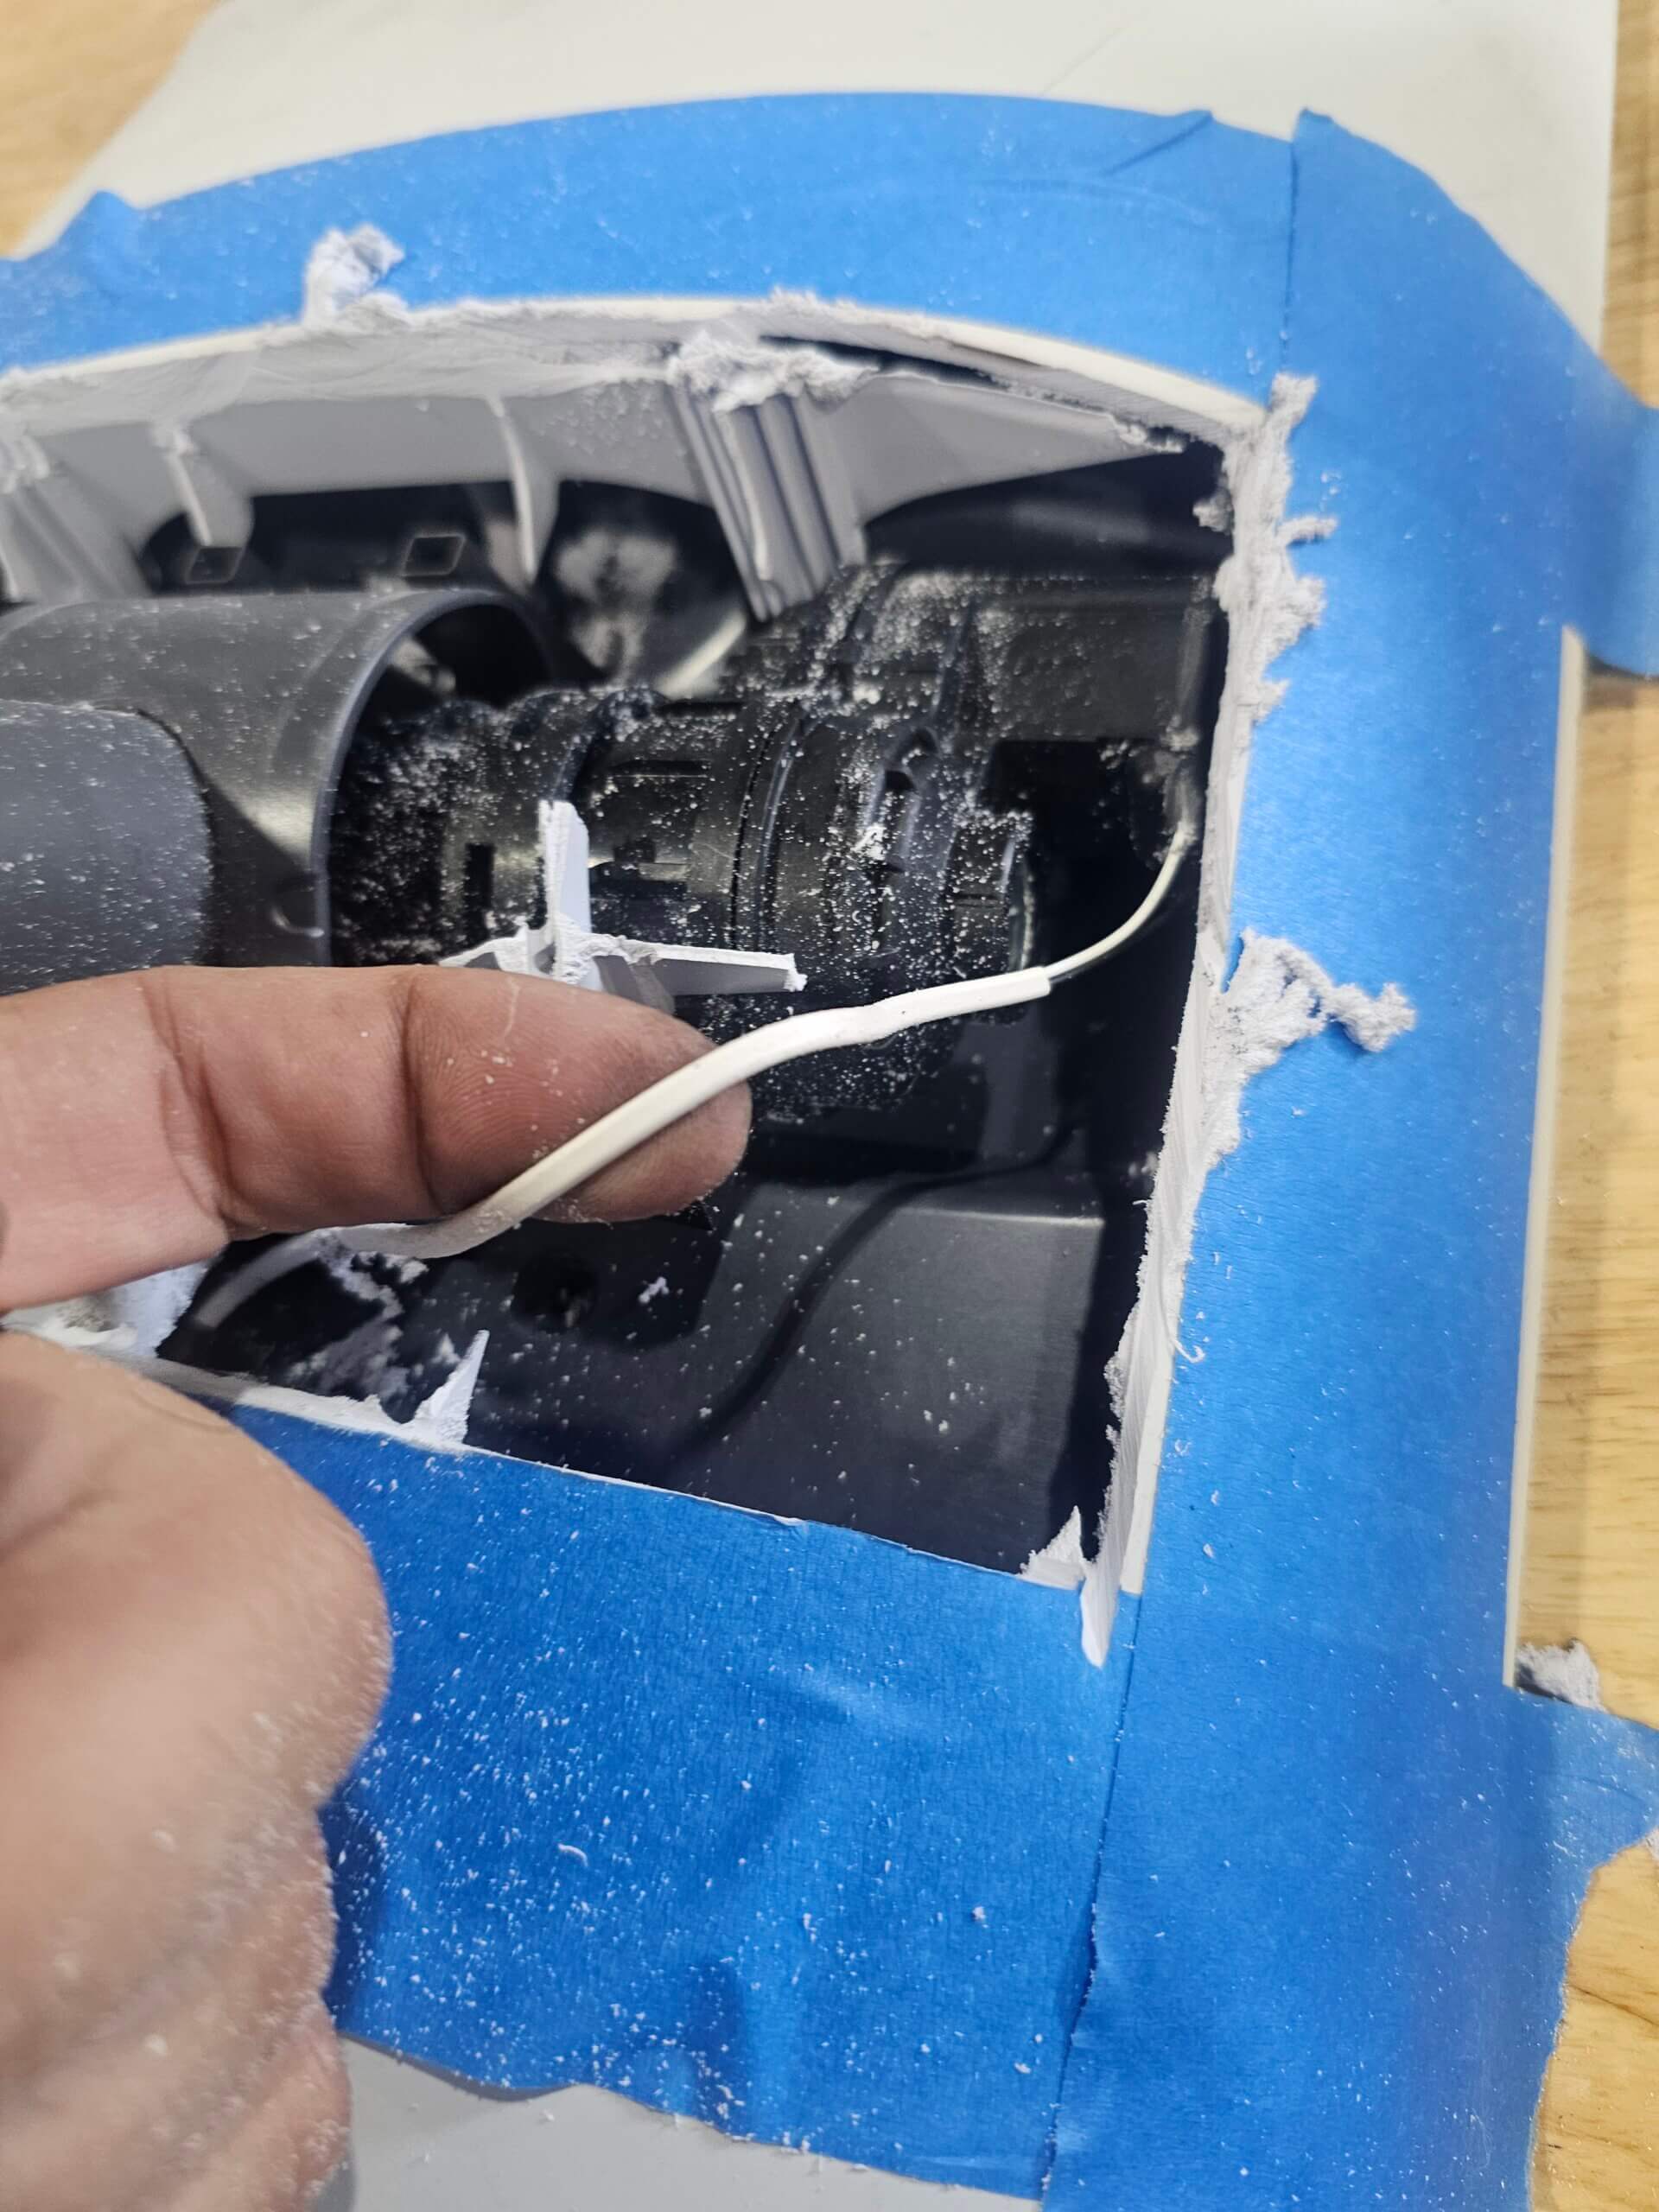
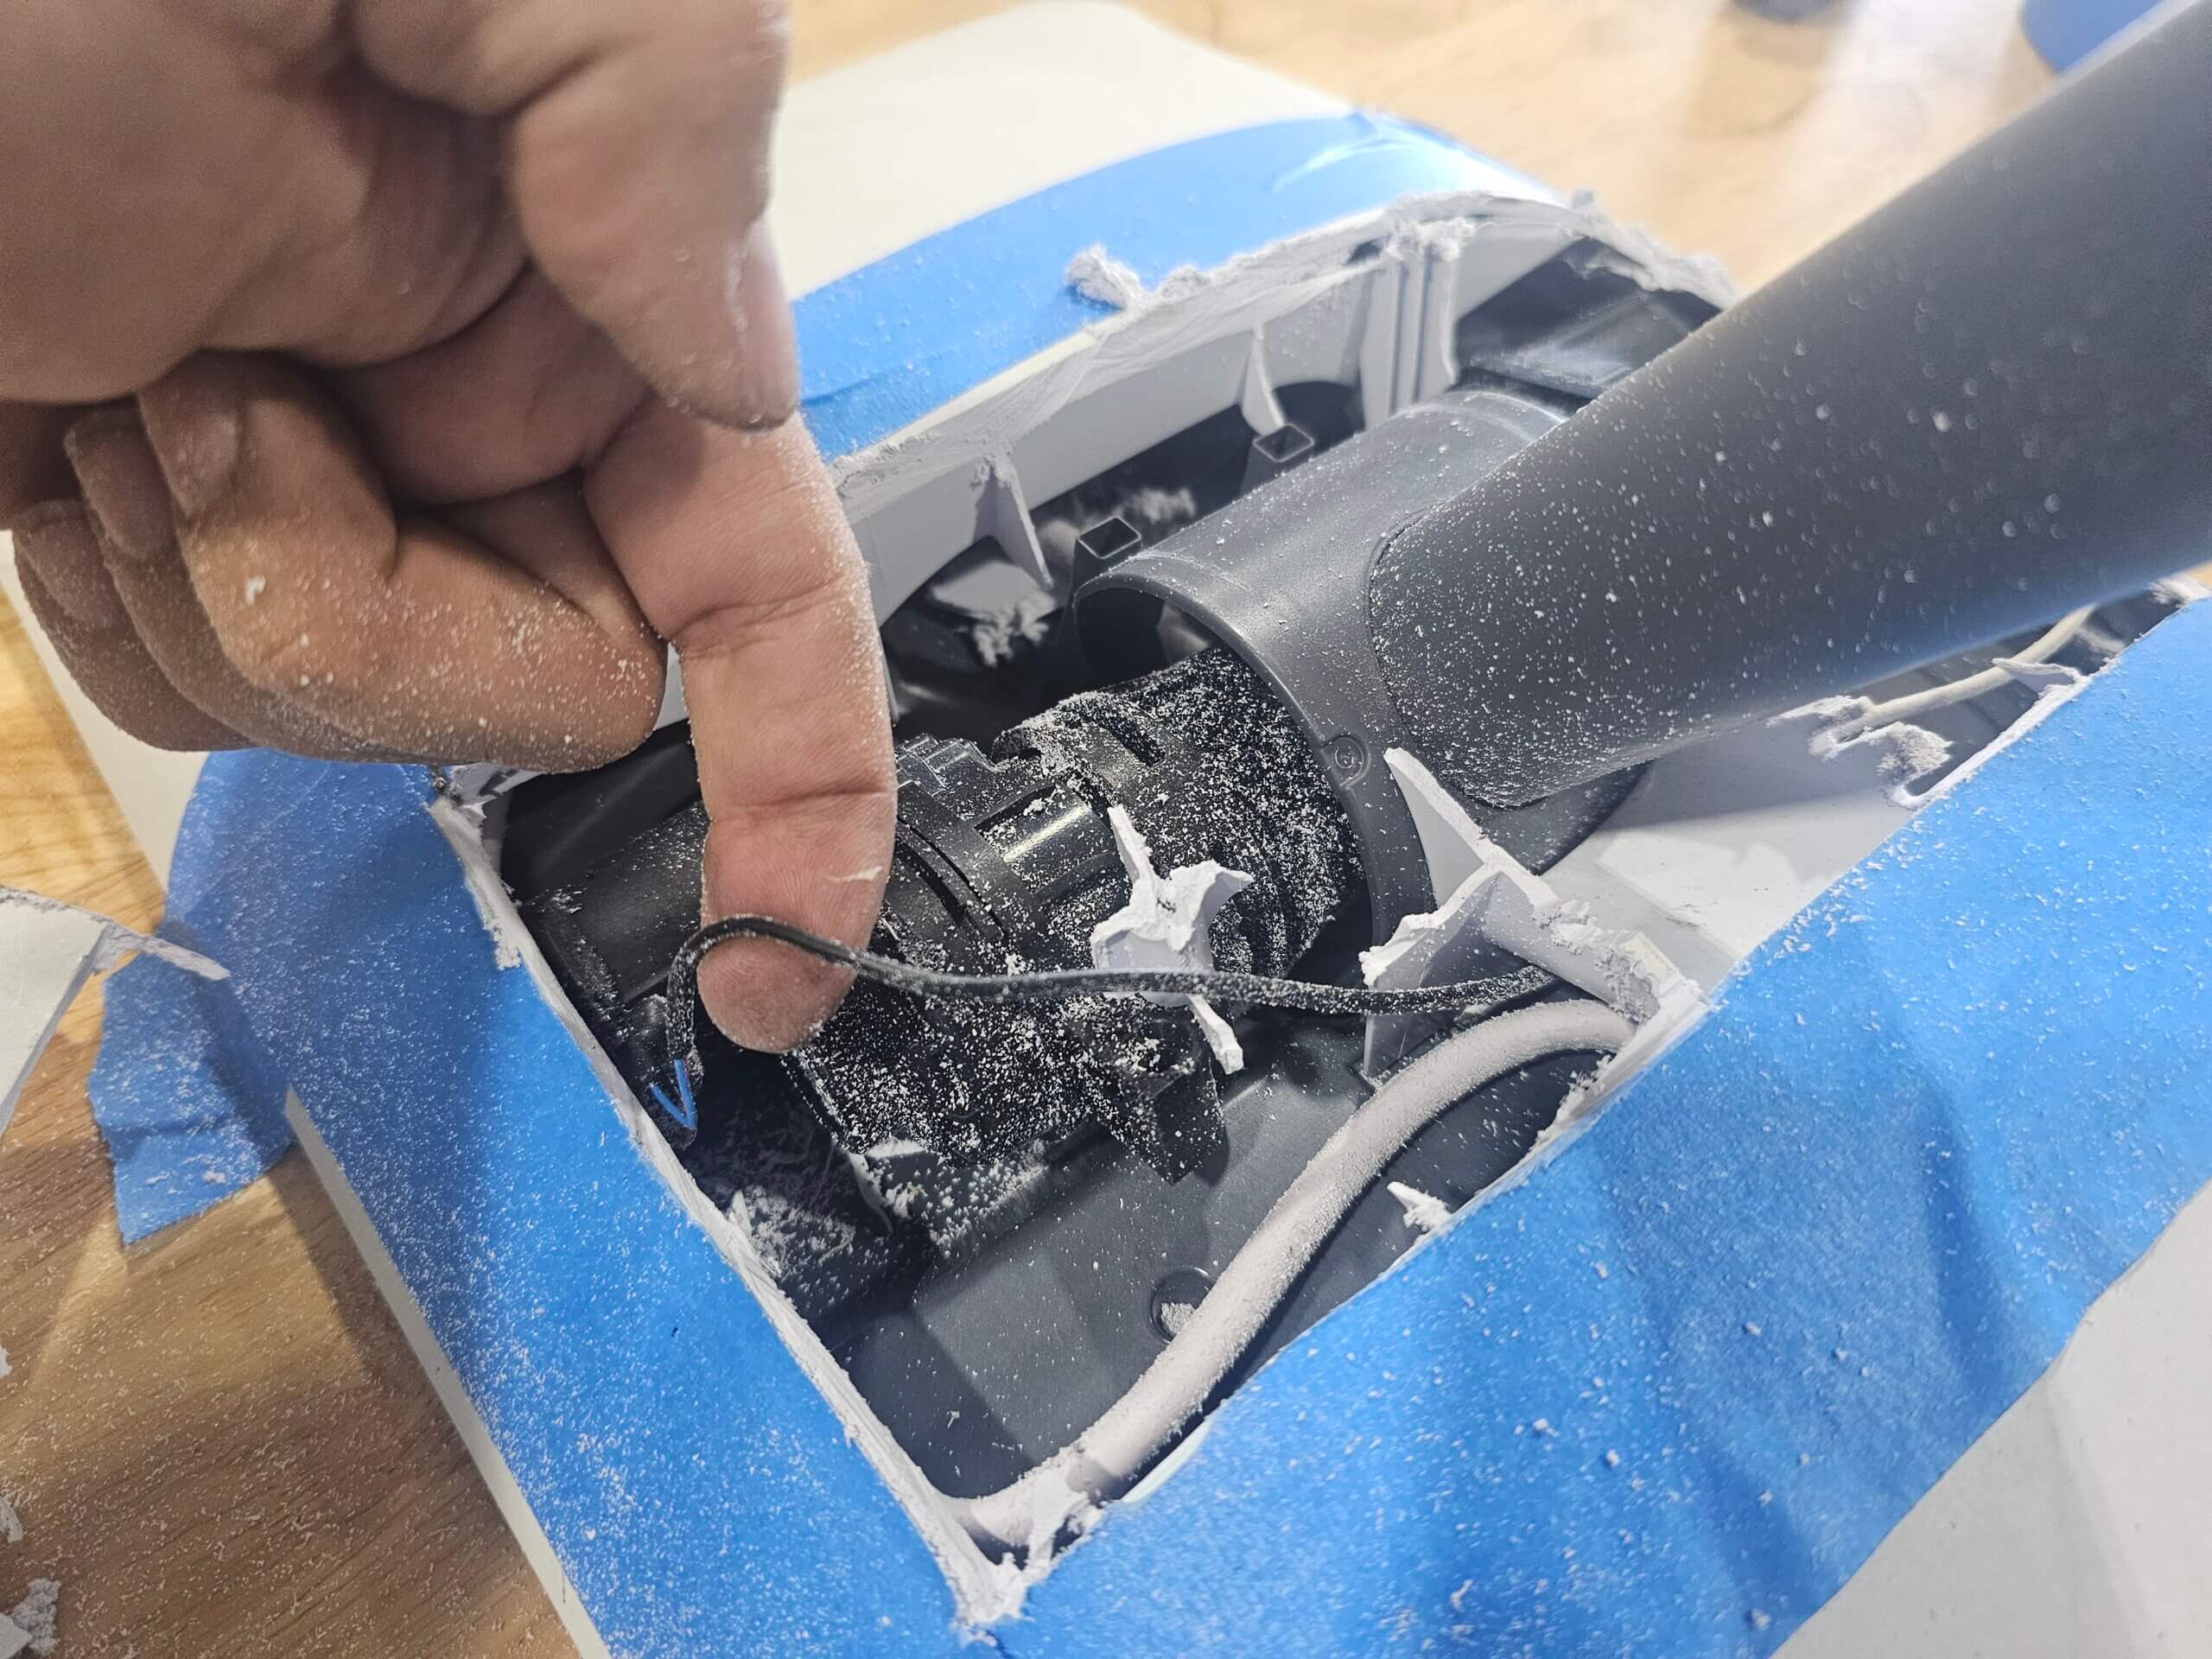
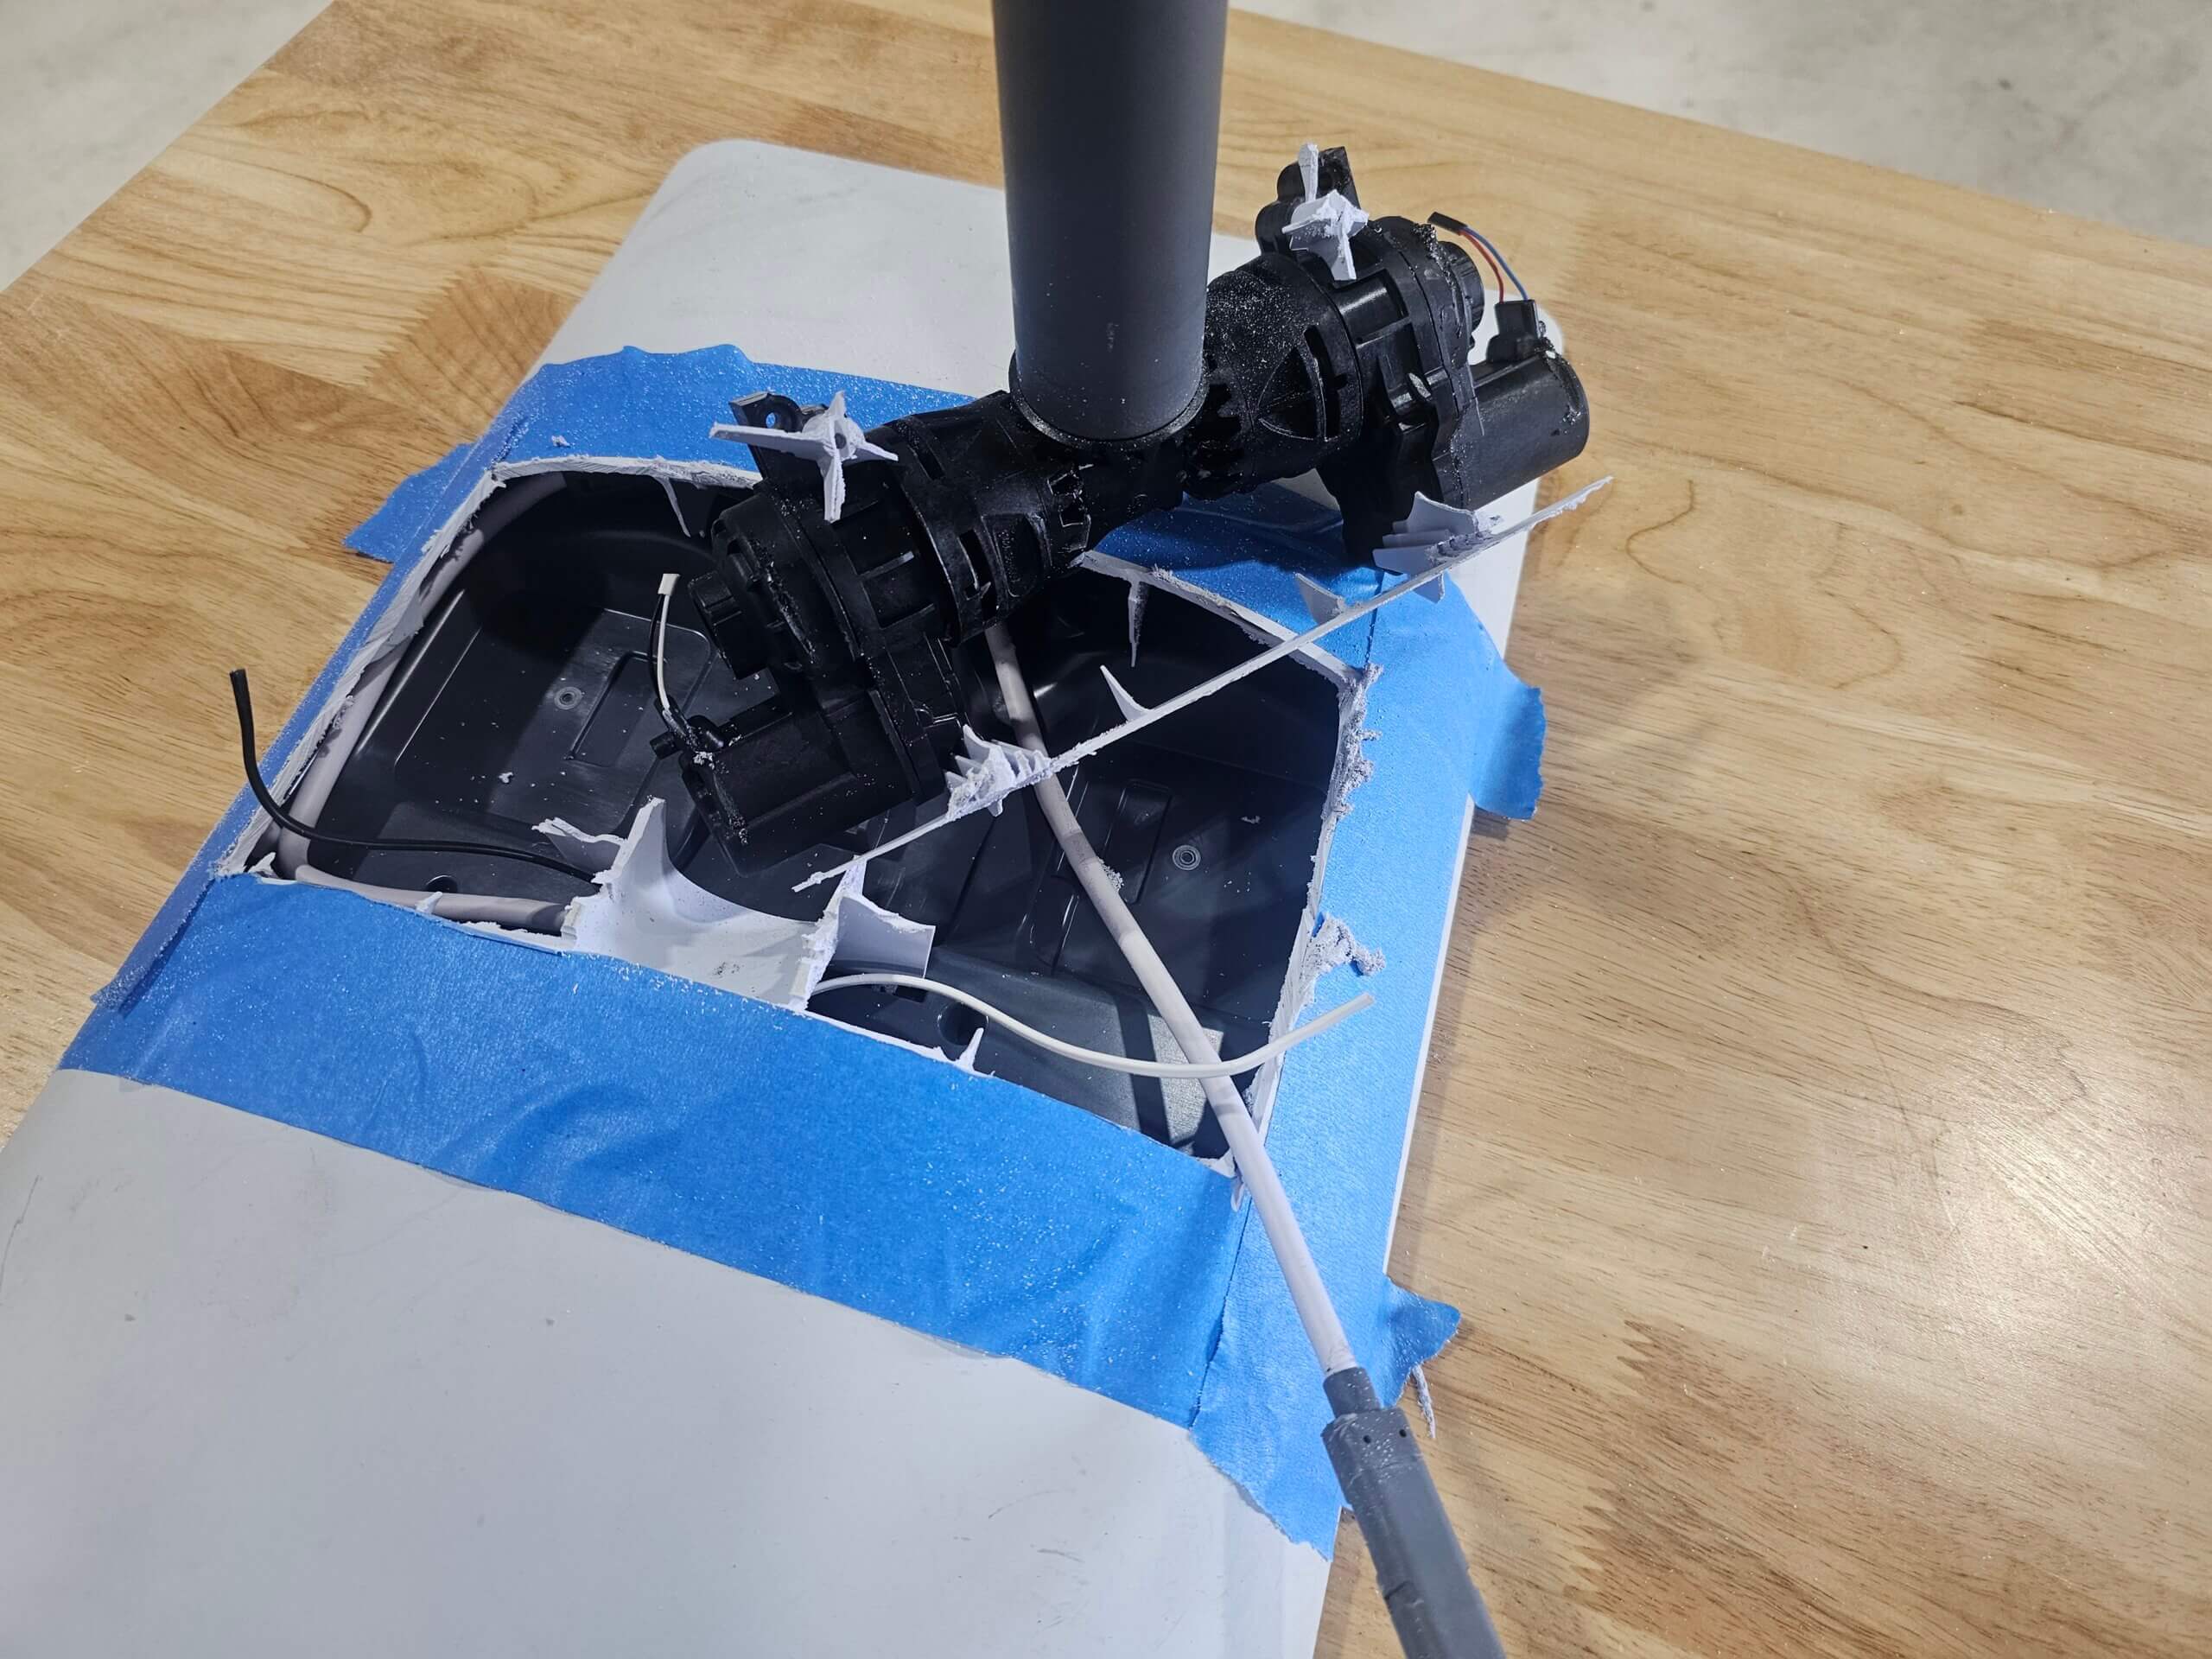
3. Modifying the Starlink Receiver
With Starlink’s increasing number of satellites in orbit, it’s no longer critical for the unit to pan and turn to find a signal. This advancement allows us to modify the receiver for a fixed mount position. Here’s how to modify the Starlink Gen 2 receiver to fit onto the flat mount:
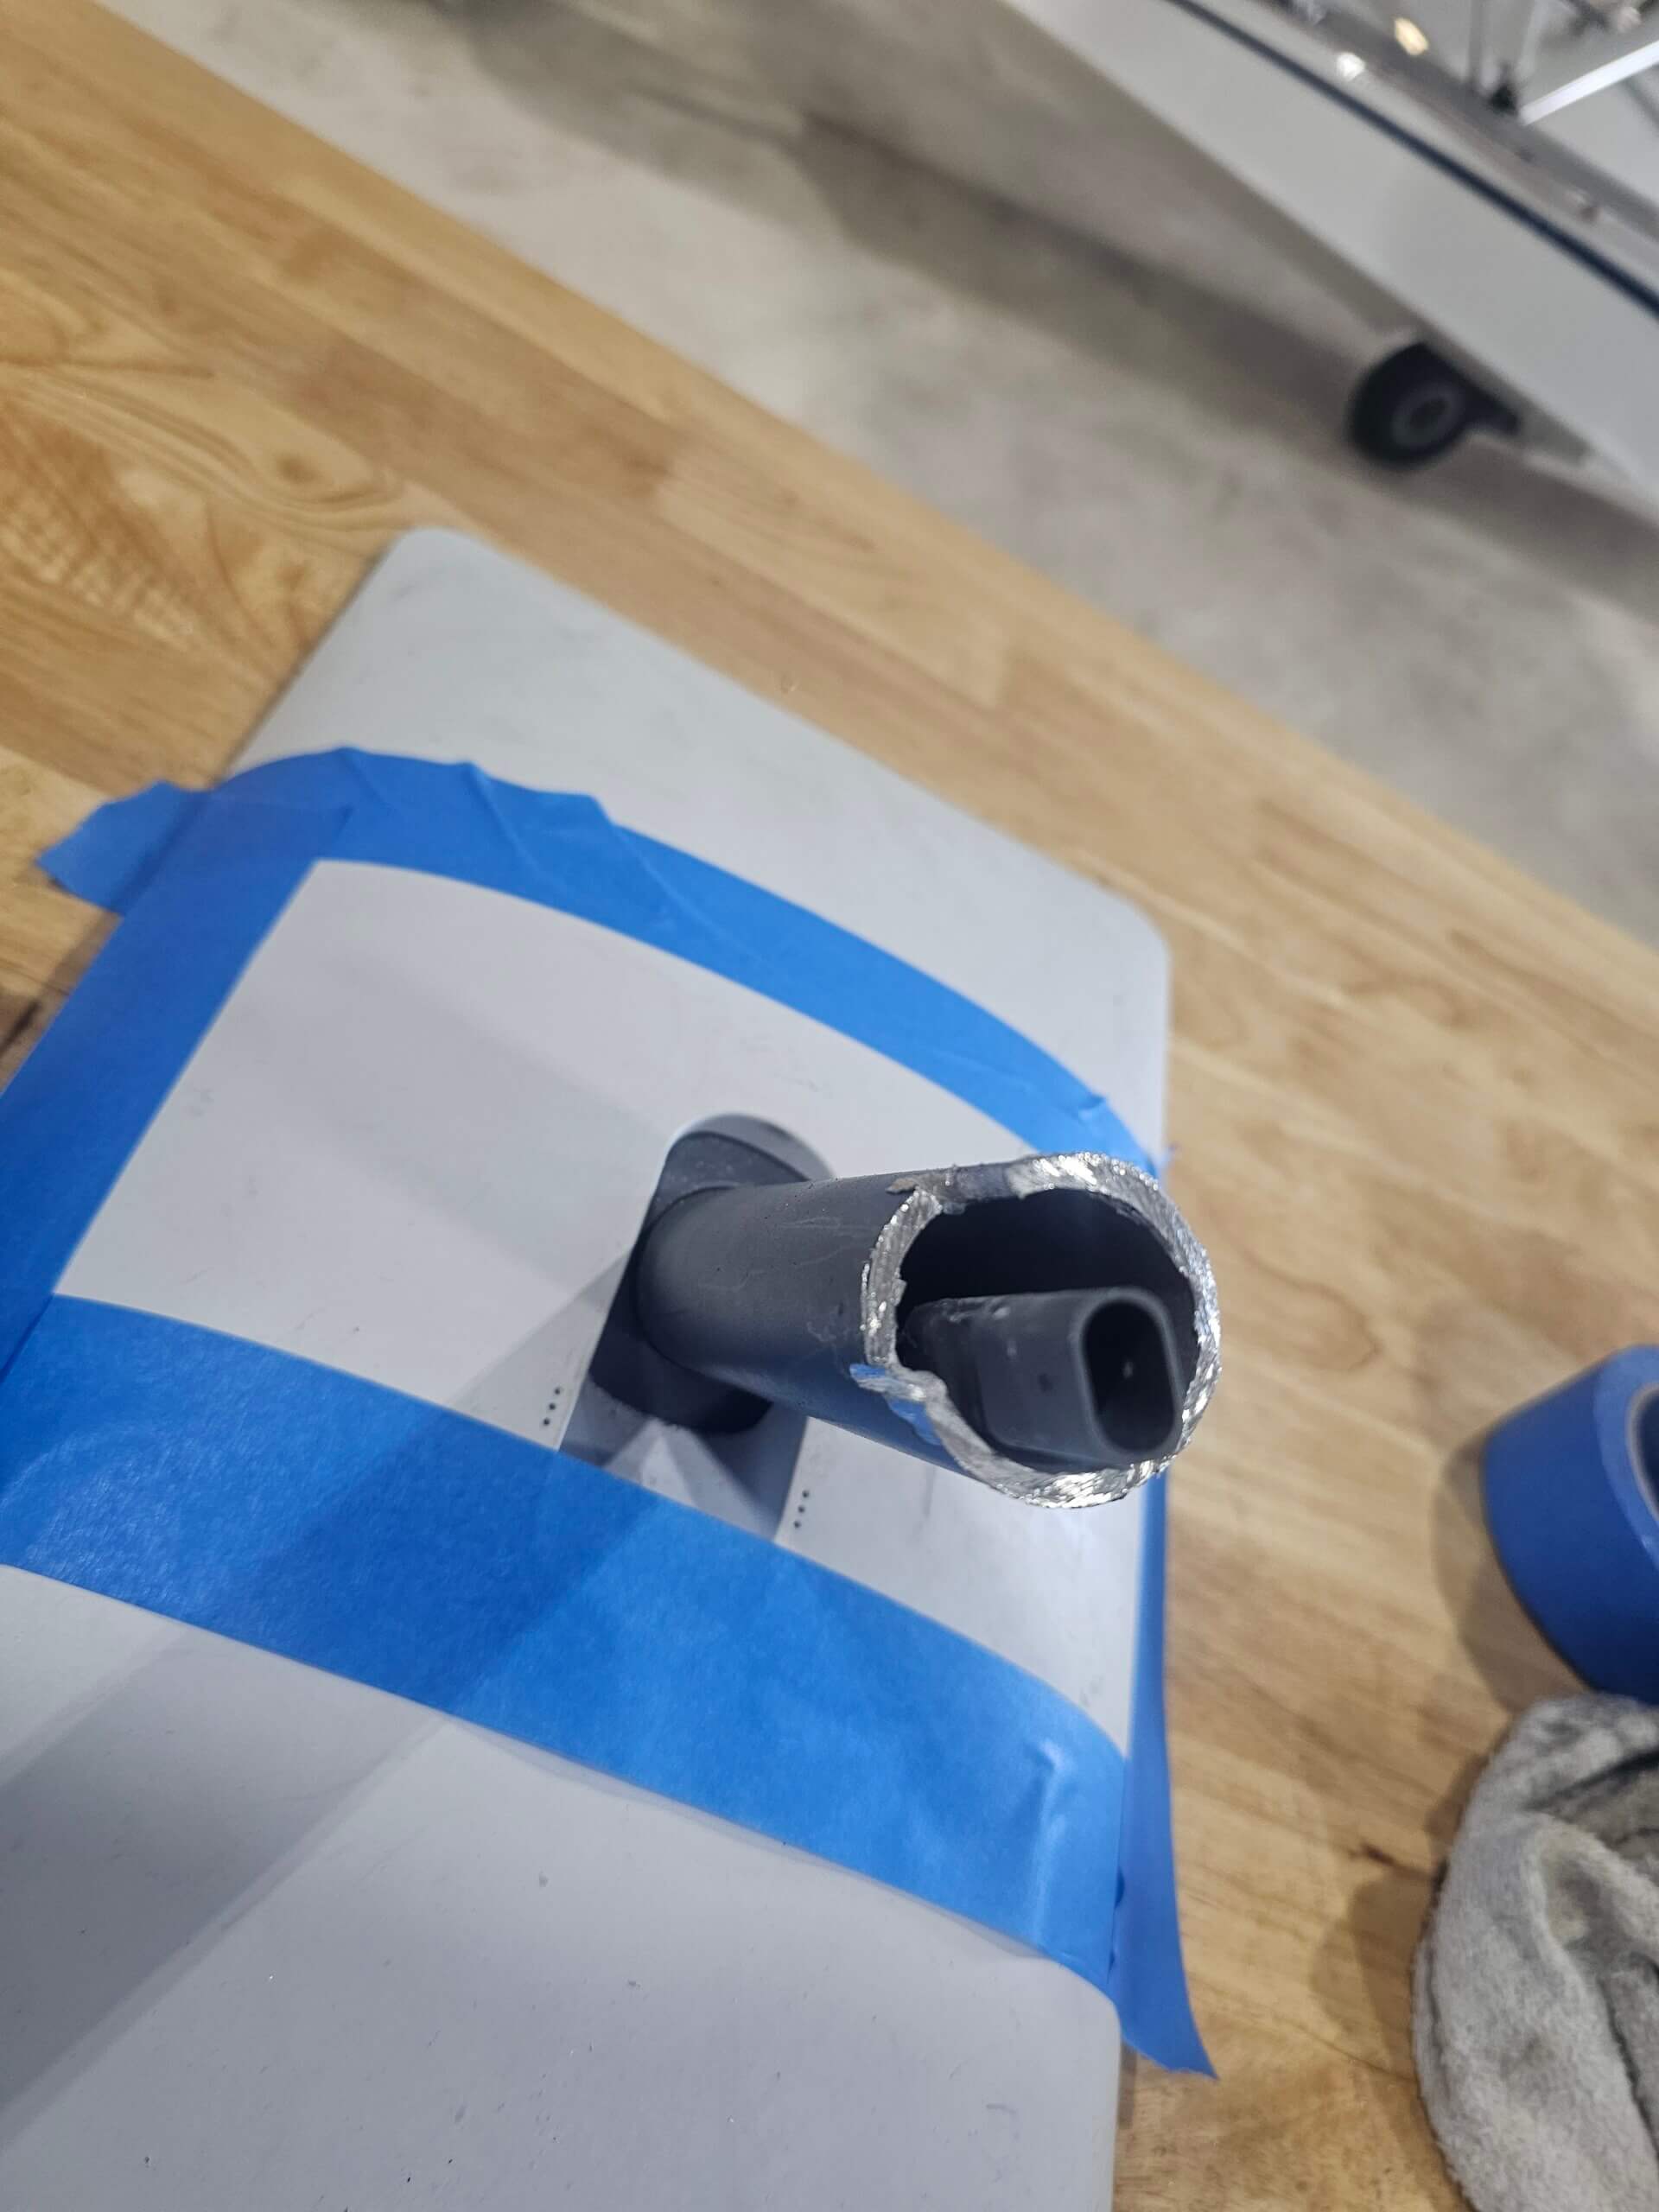
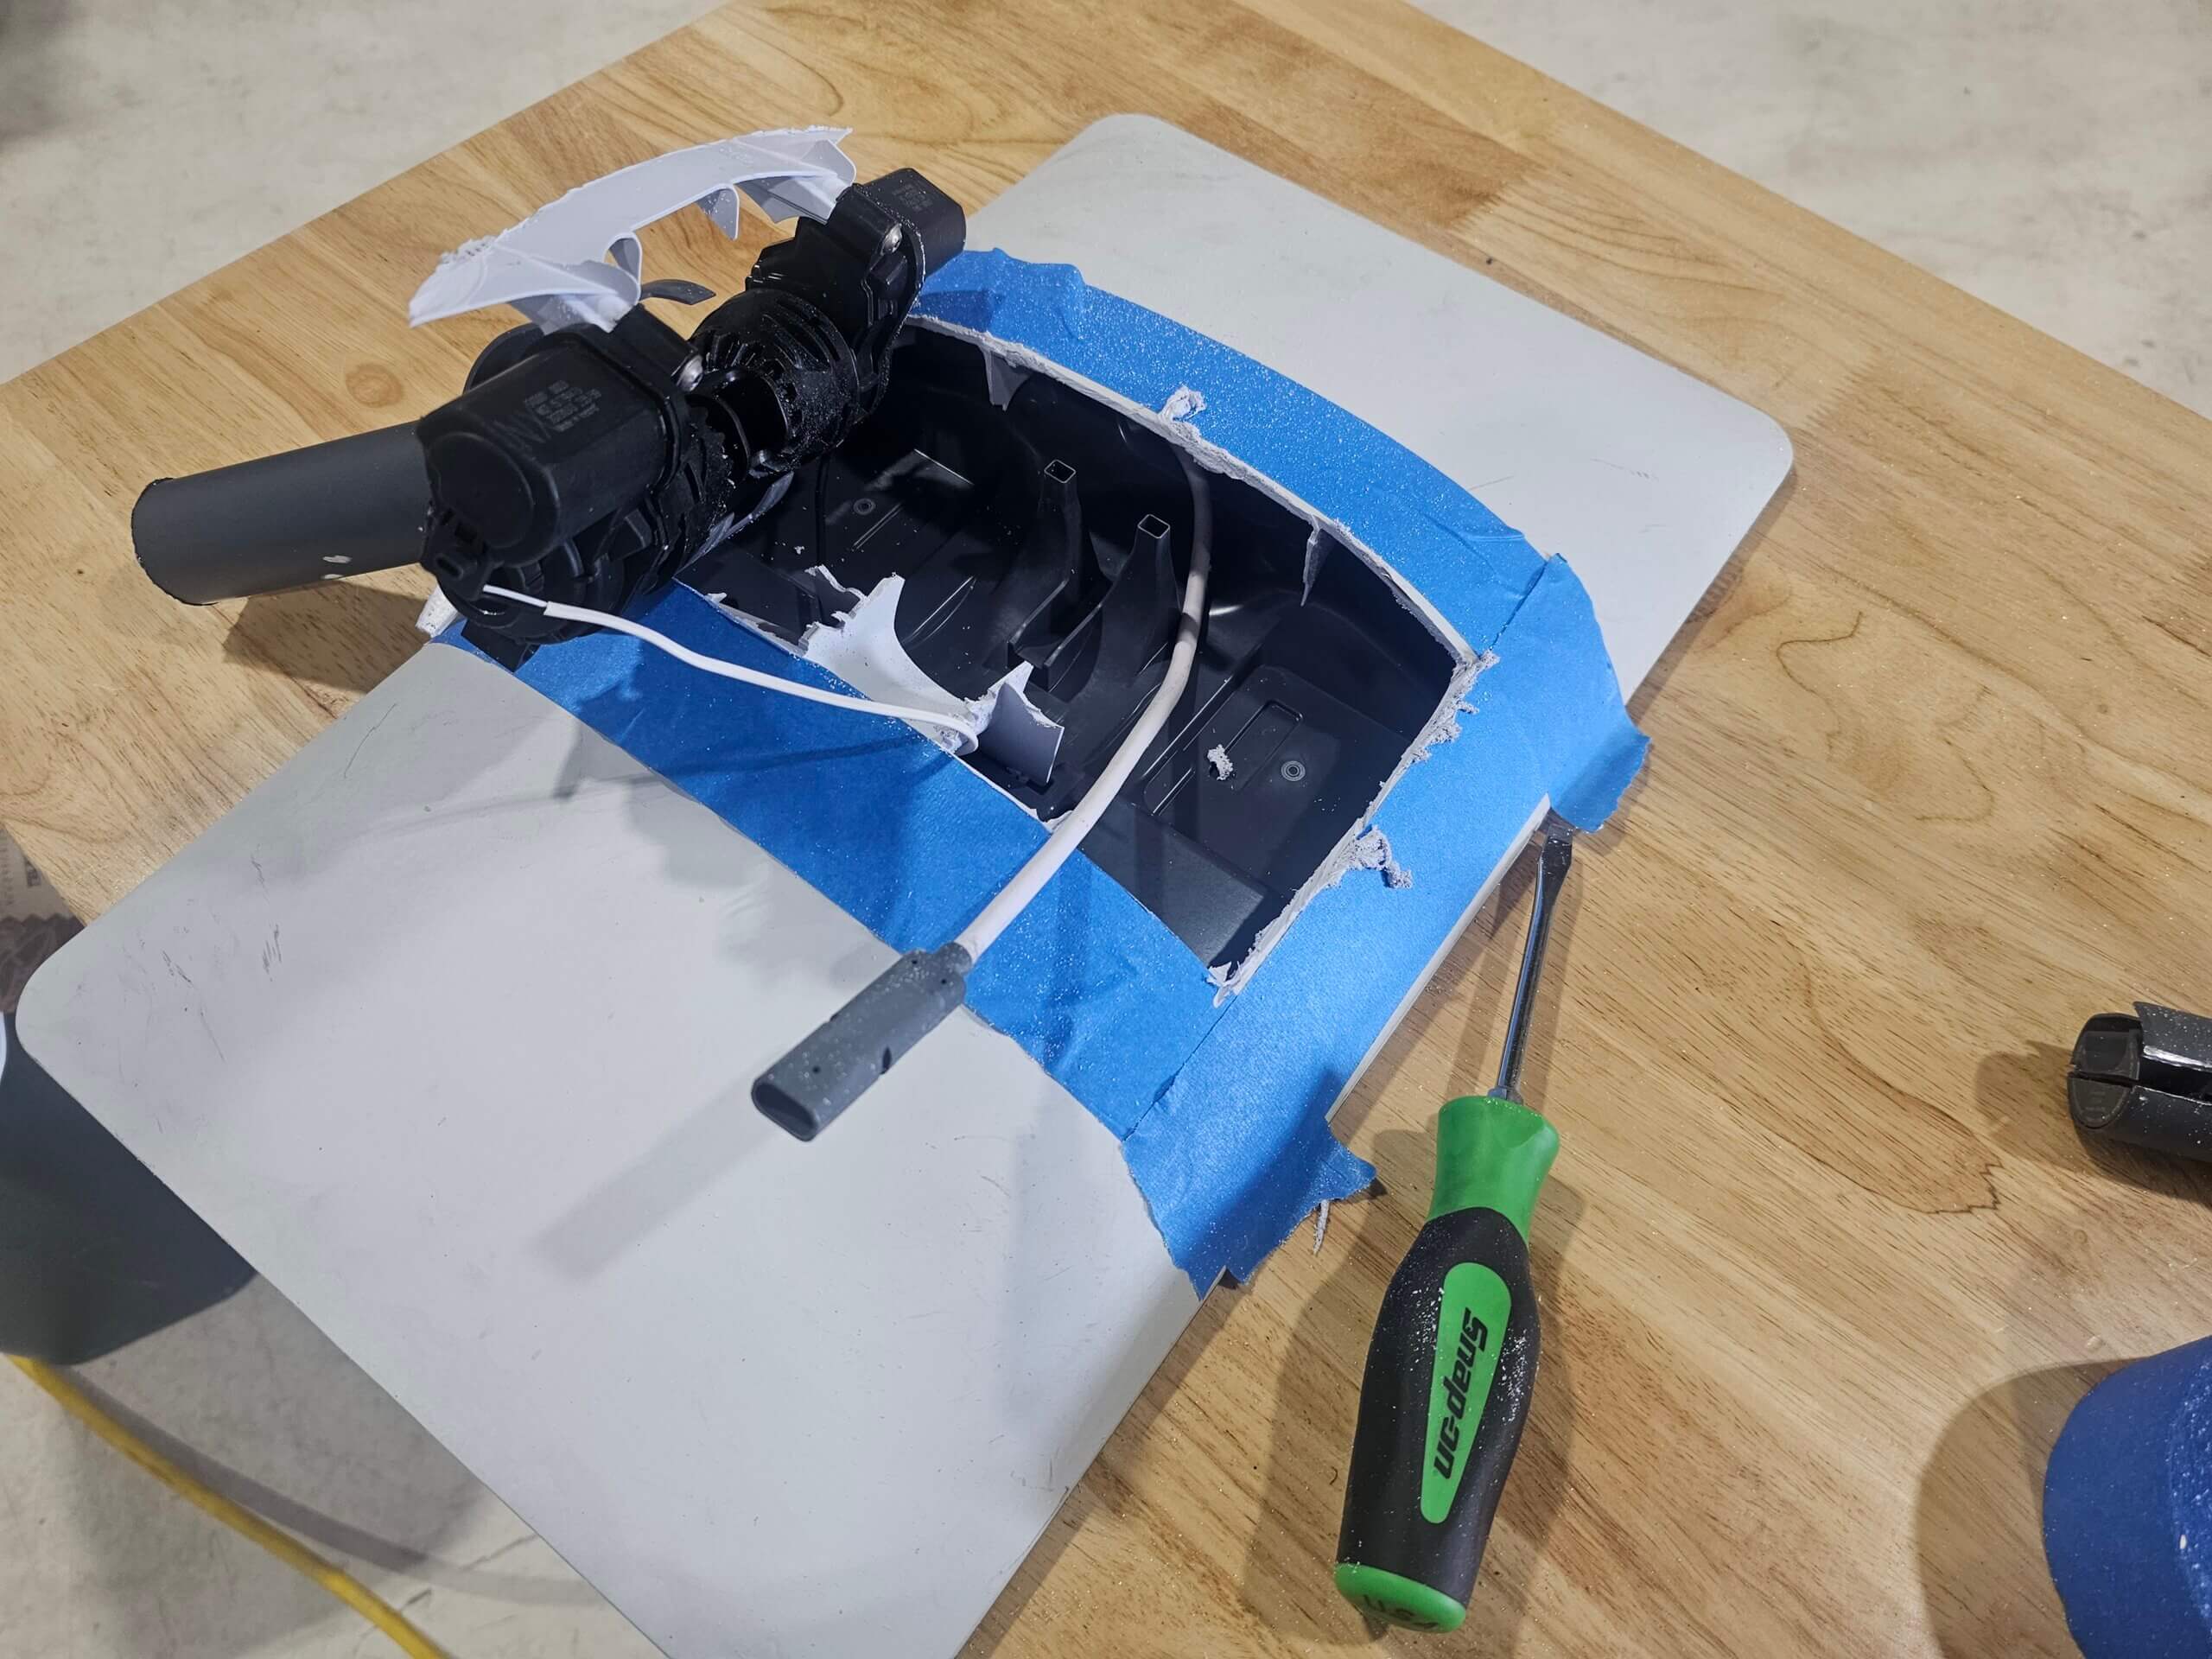
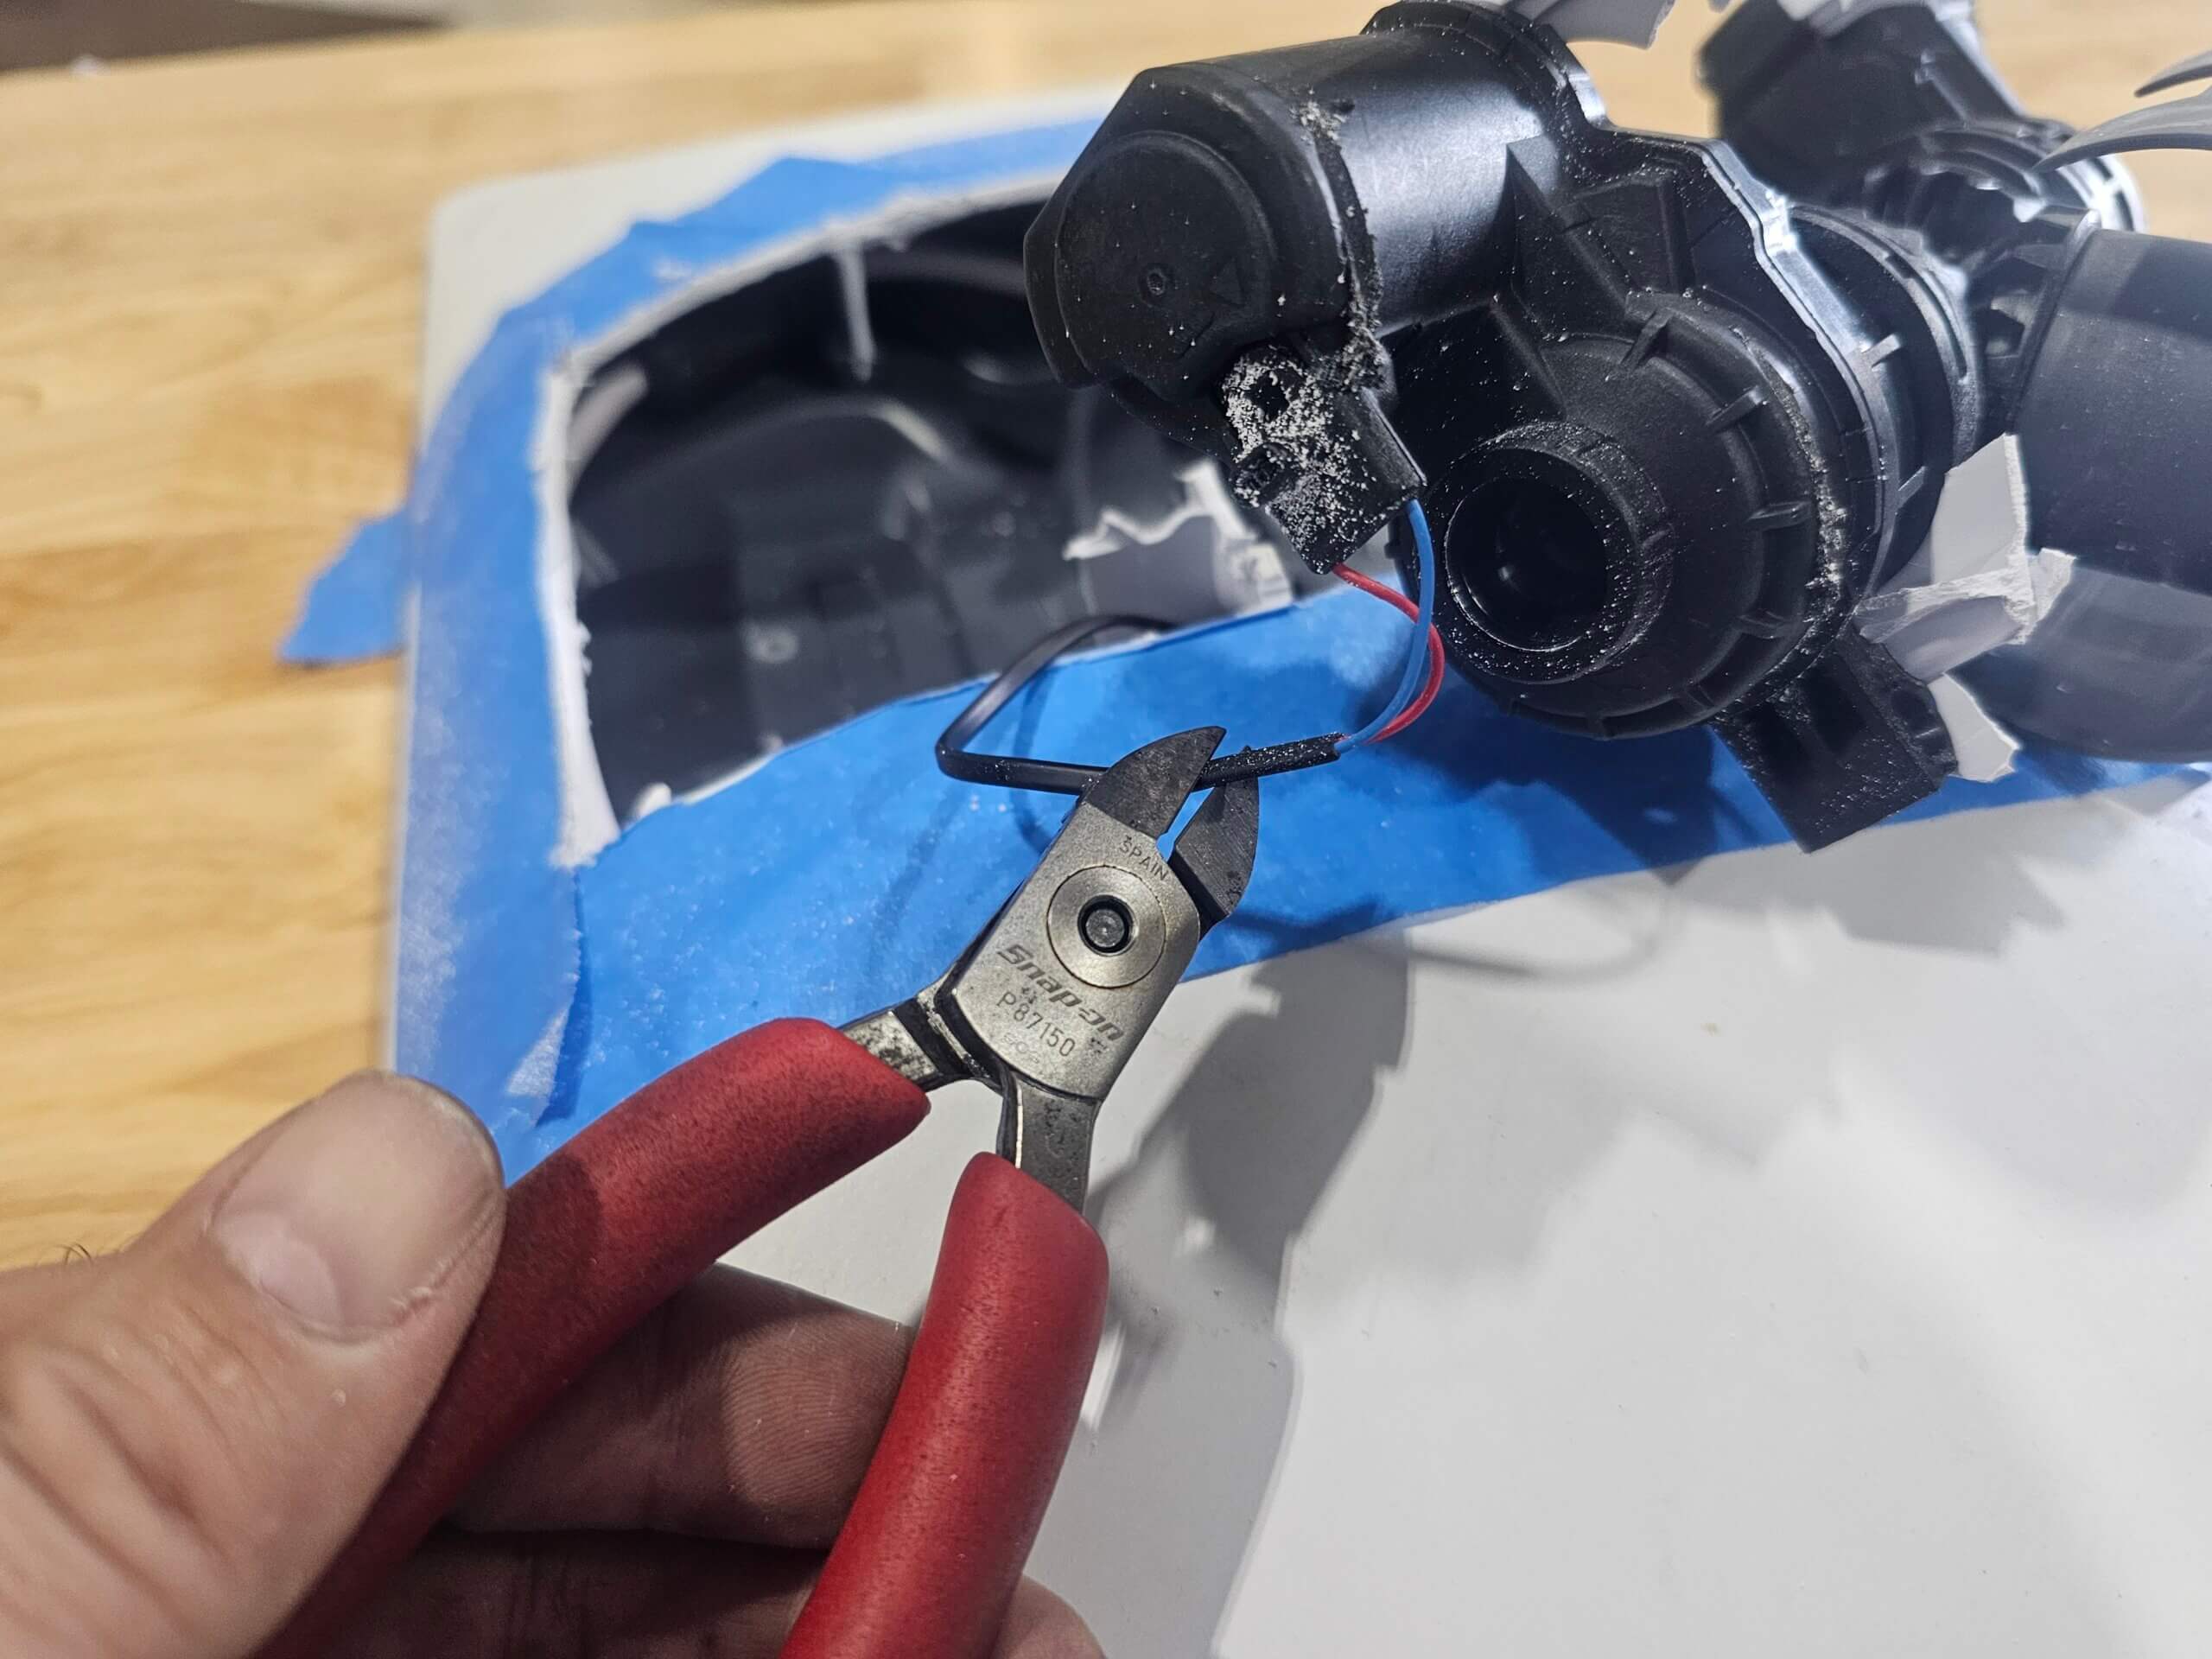
- Remove the Pole and Motors: Carefully cut the existing pole and motor components from the back of the receiver.
- Disconnect Wires: Sever the two wires connected to the motors—the left and right (up/down) motors. Ensure you leave enough wire length to connect to the necessary extension wires.
- Seal the Back: Use duct tape to seal the back of the receiver. While it’s not critical due to the elevated position on the RV roof, sealing with electrical tape around the wires prevents moisture ingress.
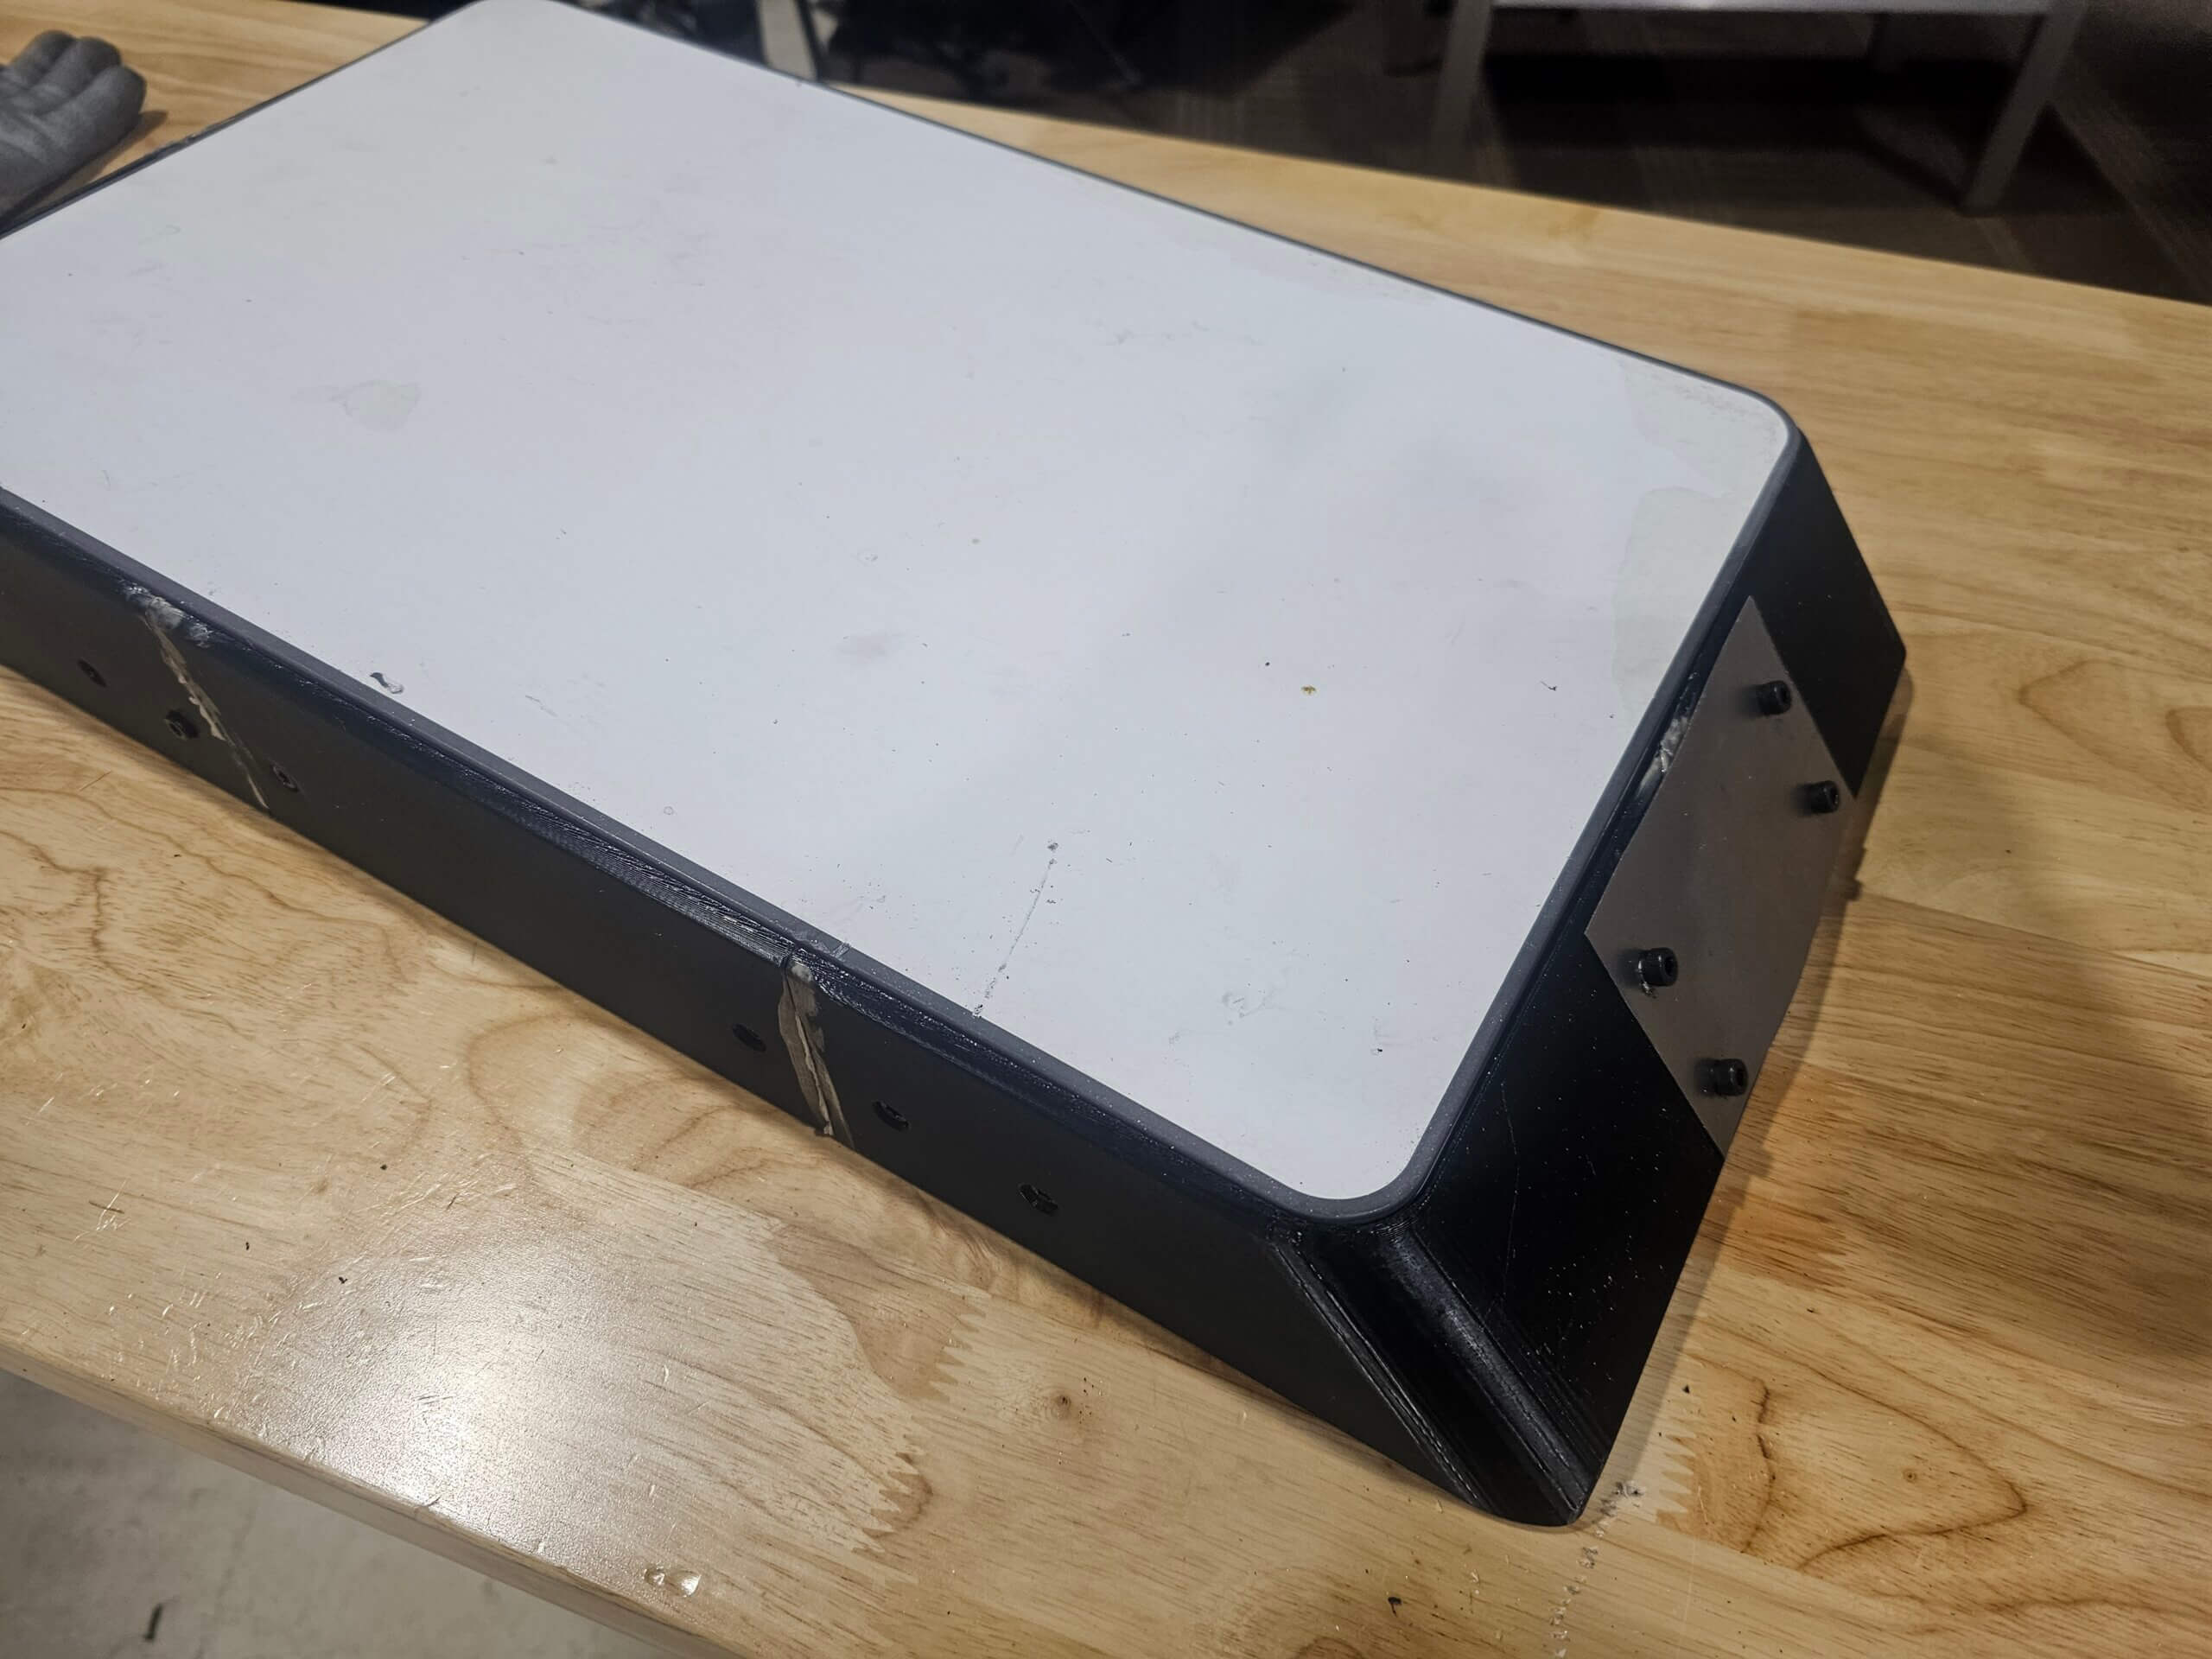
4. Painting the Mount
To protect the 3D printed mount from UV damage, spray paint the exterior. This additional layer safeguards against sun degradation, prolonging the mount’s lifespan.
5. Installing the Mount on the RV Roof
Follow these steps to securely install the mount:
- Prepare the Roof Surface: Clean the area where the mount will be attached.
- Apply Core and Decoring: Install core materials first, then decore (decorative trim) around the mounts.
- Position the Mount: Place the assembled mount on the roof, ensuring a slight gap underneath for airflow. This gap allows moisture to escape, preventing water accumulation that could damage the RV’s roof.
- Secure with Screws: Fasten the mount to the roof using appropriate screws. Ensure it’s tightly secured to withstand vibrations and movement during travel.
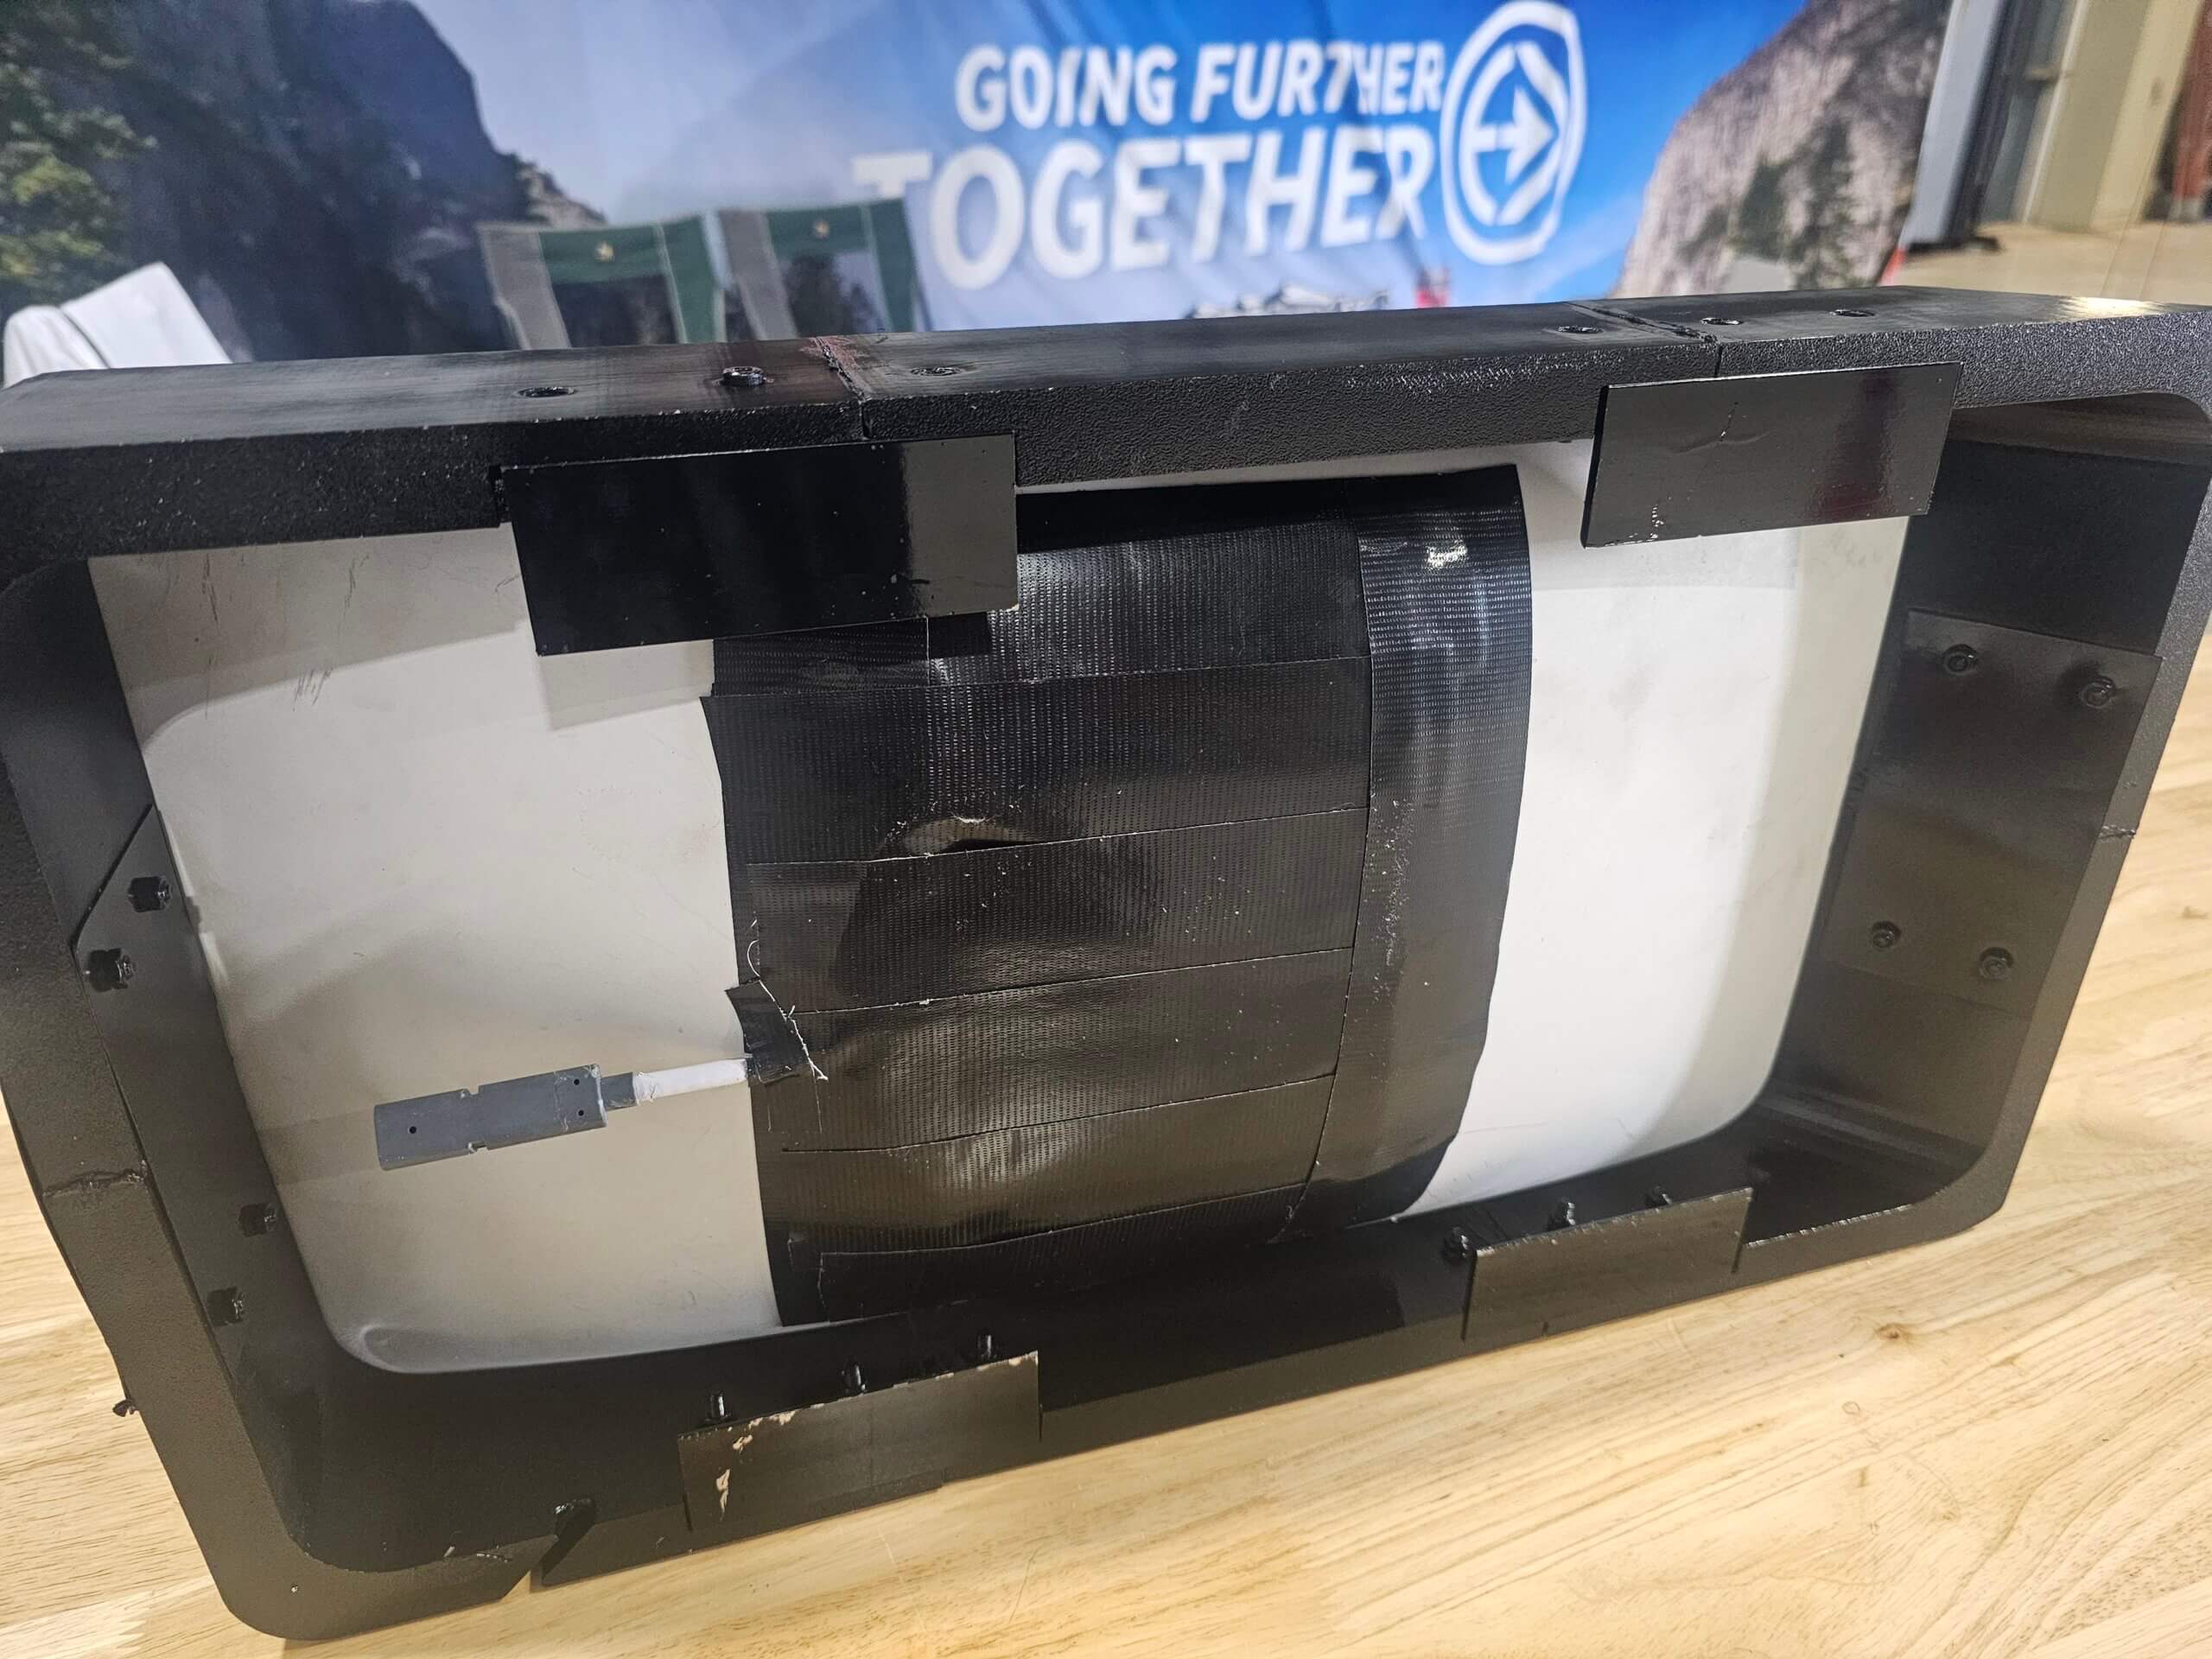
6. Securing the Starlink Receiver
With the mount in place, proceed to attach the Starlink receiver:
- Apply Silicone Sealant: Around the inside edge of the mount, apply a generous bead of silicone sealant. This step ensures the receiver stays in place and is protected from the elements.
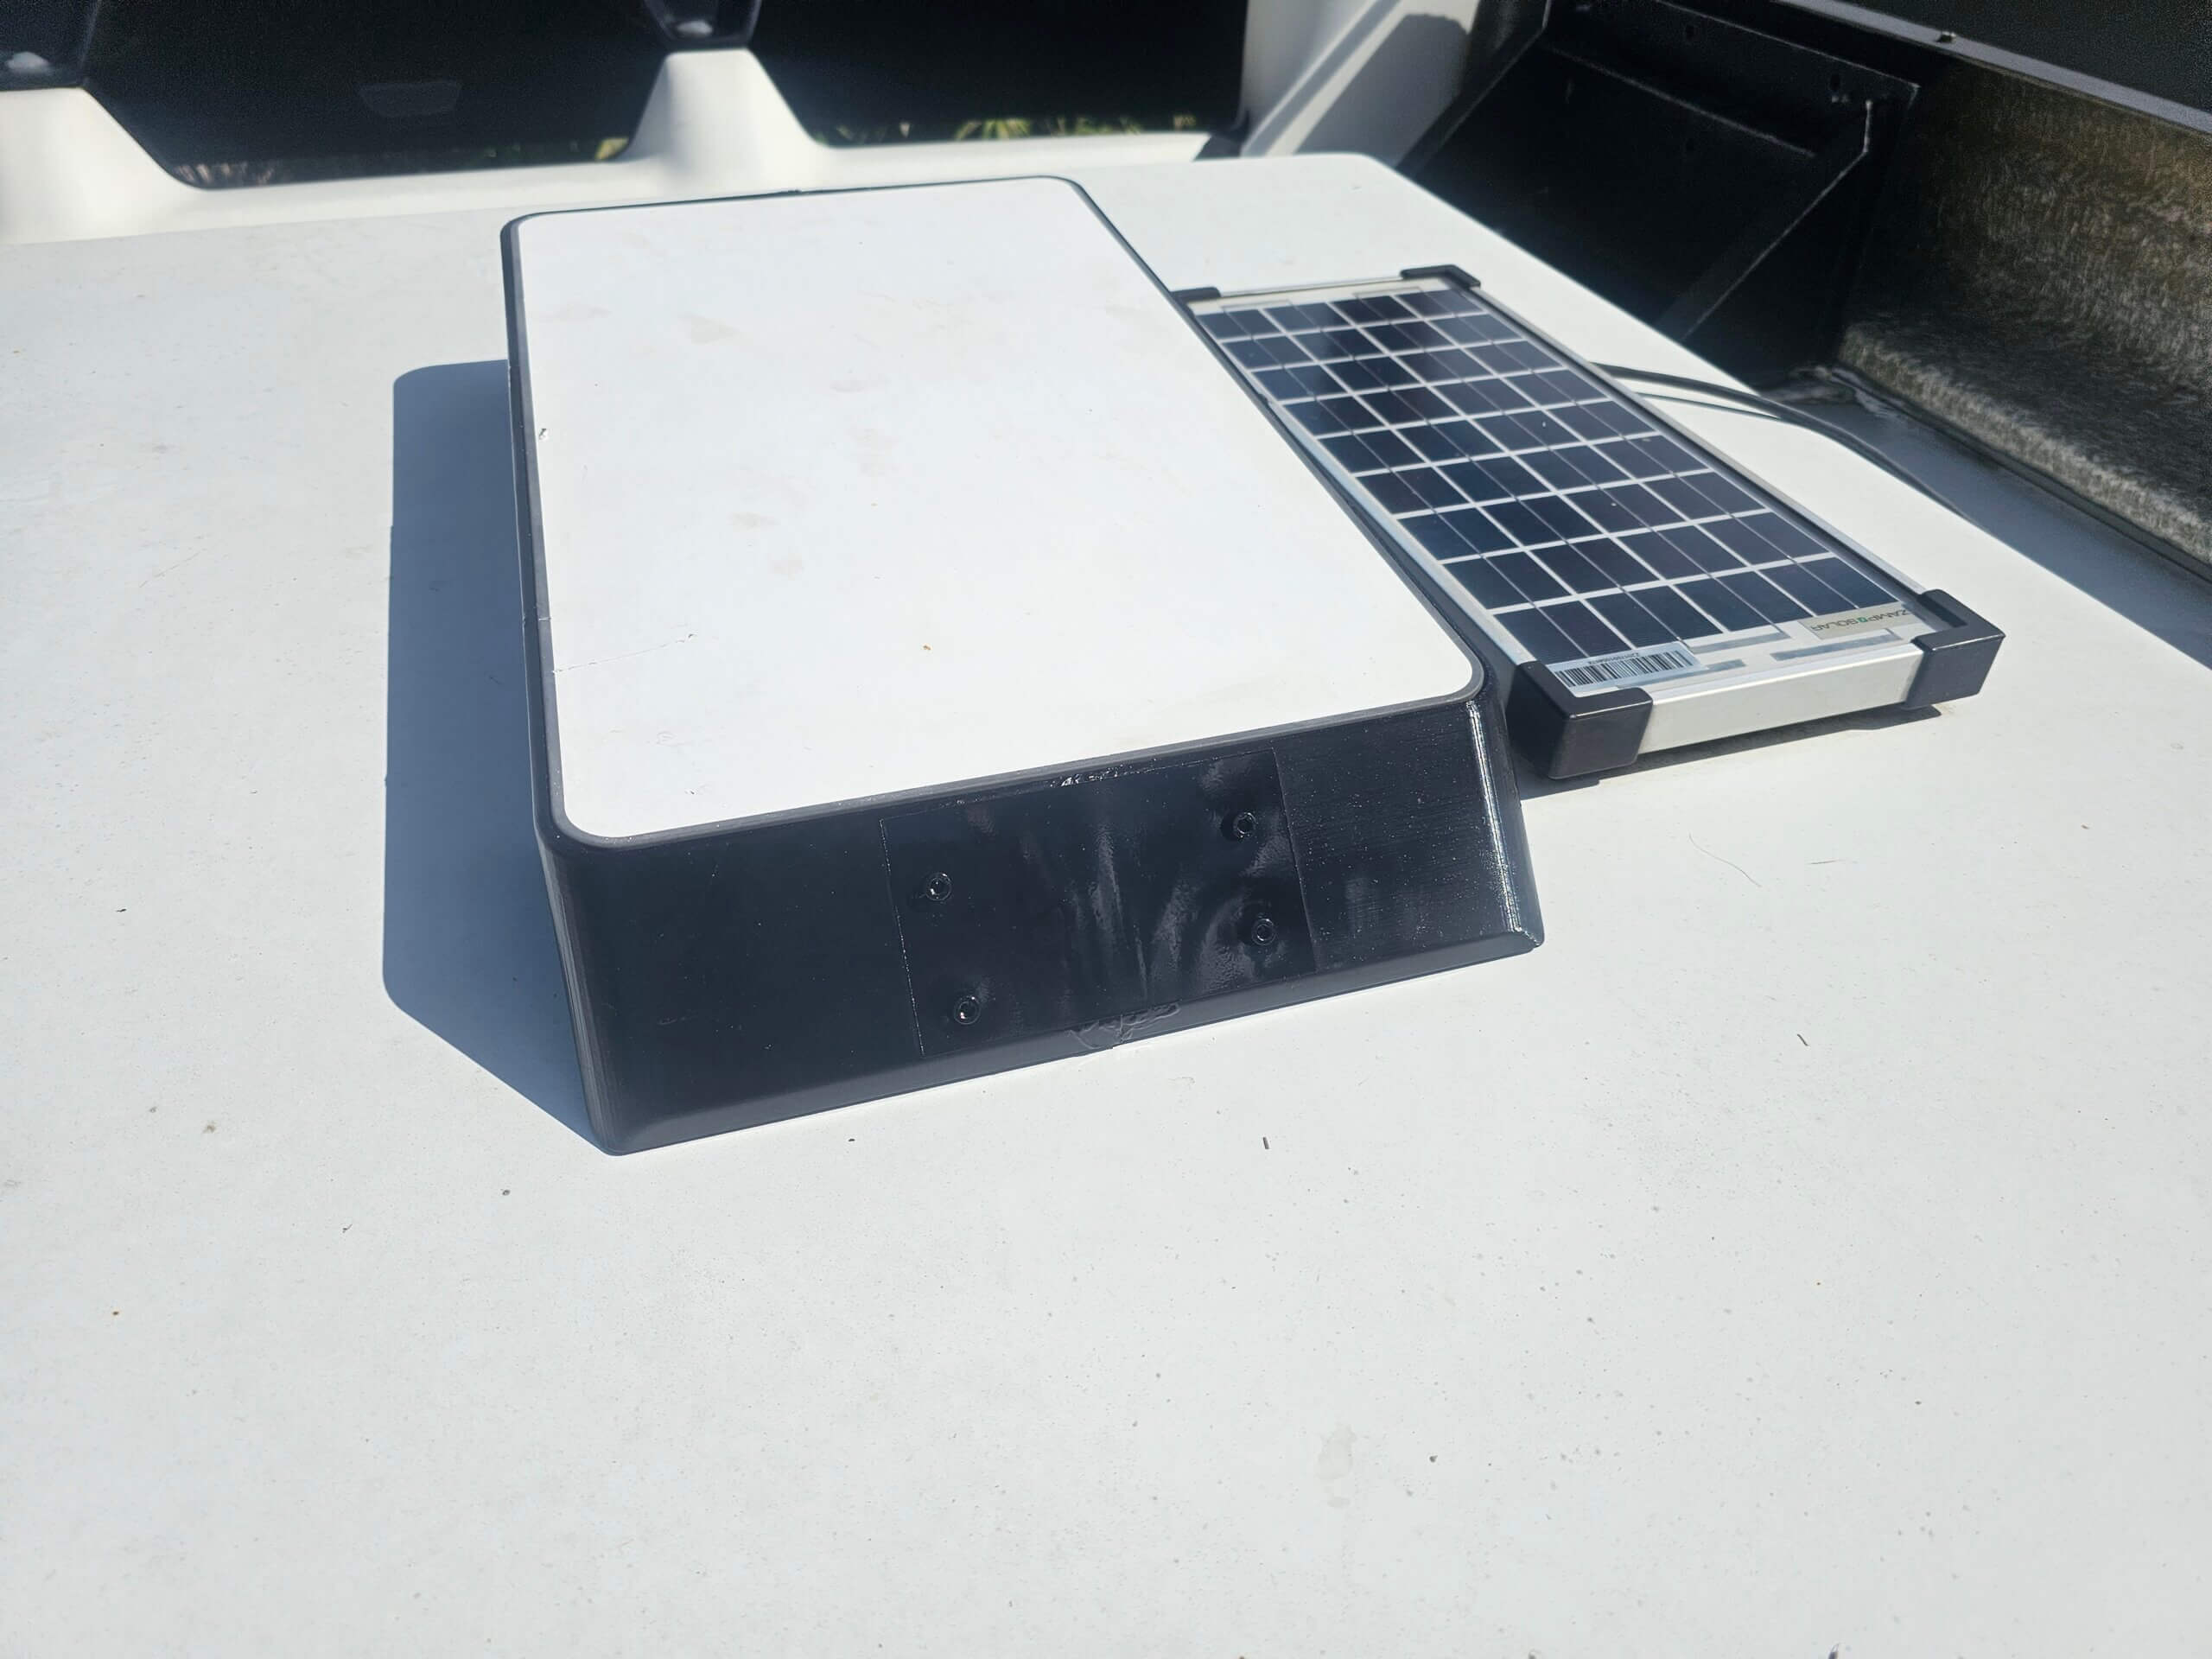
- Mount the Receiver: Gently place the modified Starlink receiver onto the mount, ensuring it sits securely.
- Final Seal: Allow the silicone sealant to cure fully, typically requiring a dry day with no rain or extreme temperatures.
Optimizing Coverage and Speed with Dual Starlink Systems
One of the reasons I chose to mount my custom Starlink system at the back of my RV is because I also have a high-performance Starlink system mounted at the front. By bonding both systems together using a Pepwave router, I can achieve superior coverage and speeds. This setup is particularly useful when one end of the RV is under a tree or other obstruction—while one receiver may be blocked, the other often remains clear. Additionally, bonding both systems, including WiFi, allows for faster and more reliable internet access, crucial for streaming, remote work, and other data-intensive activities.
Pros of Having Starlink for Your RV Internet
Integrating Starlink into your RV setup offers numerous advantages:
- High-Speed Connectivity Anywhere: Starlink provides robust internet access across vast and remote areas where traditional cellular networks may falter.
- Low Latency: Ideal for activities requiring real-time responses, such as video conferencing or online gaming.
- Easy Setup: The flat mount system simplifies installation, making it straightforward to set up your internet connection on the go.
- Reliability: With a constellation of satellites, Starlink offers consistent connectivity, reducing the chances of dropped signals.
- Scalability: As Starlink continues to expand its satellite network, users can expect even better coverage and speeds over time.
- Enhanced Travel Experience: Reliable internet access allows for streaming entertainment, navigation, and staying connected with loved ones, enhancing the overall RV experience.
Conclusion
Building and installing a custom flat mount Starlink system on your RV is a rewarding project that enhances your travel experience by providing reliable and high-speed internet access wherever the road takes you. By following the steps outlined above and leveraging the benefits of Starlink, you can ensure seamless connectivity, making your RV adventures more enjoyable and connected.
Happy travels and happy streaming!